裝置端訓練:構建 Android 應用程式
在本教程中,我們將探討如何構建一個整合 ONNX Runtime 裝置端訓練解決方案的 Android 應用程式。裝置端訓練是指直接在邊緣裝置上訓練機器學習模型的過程,不依賴雲服務或外部伺服器。
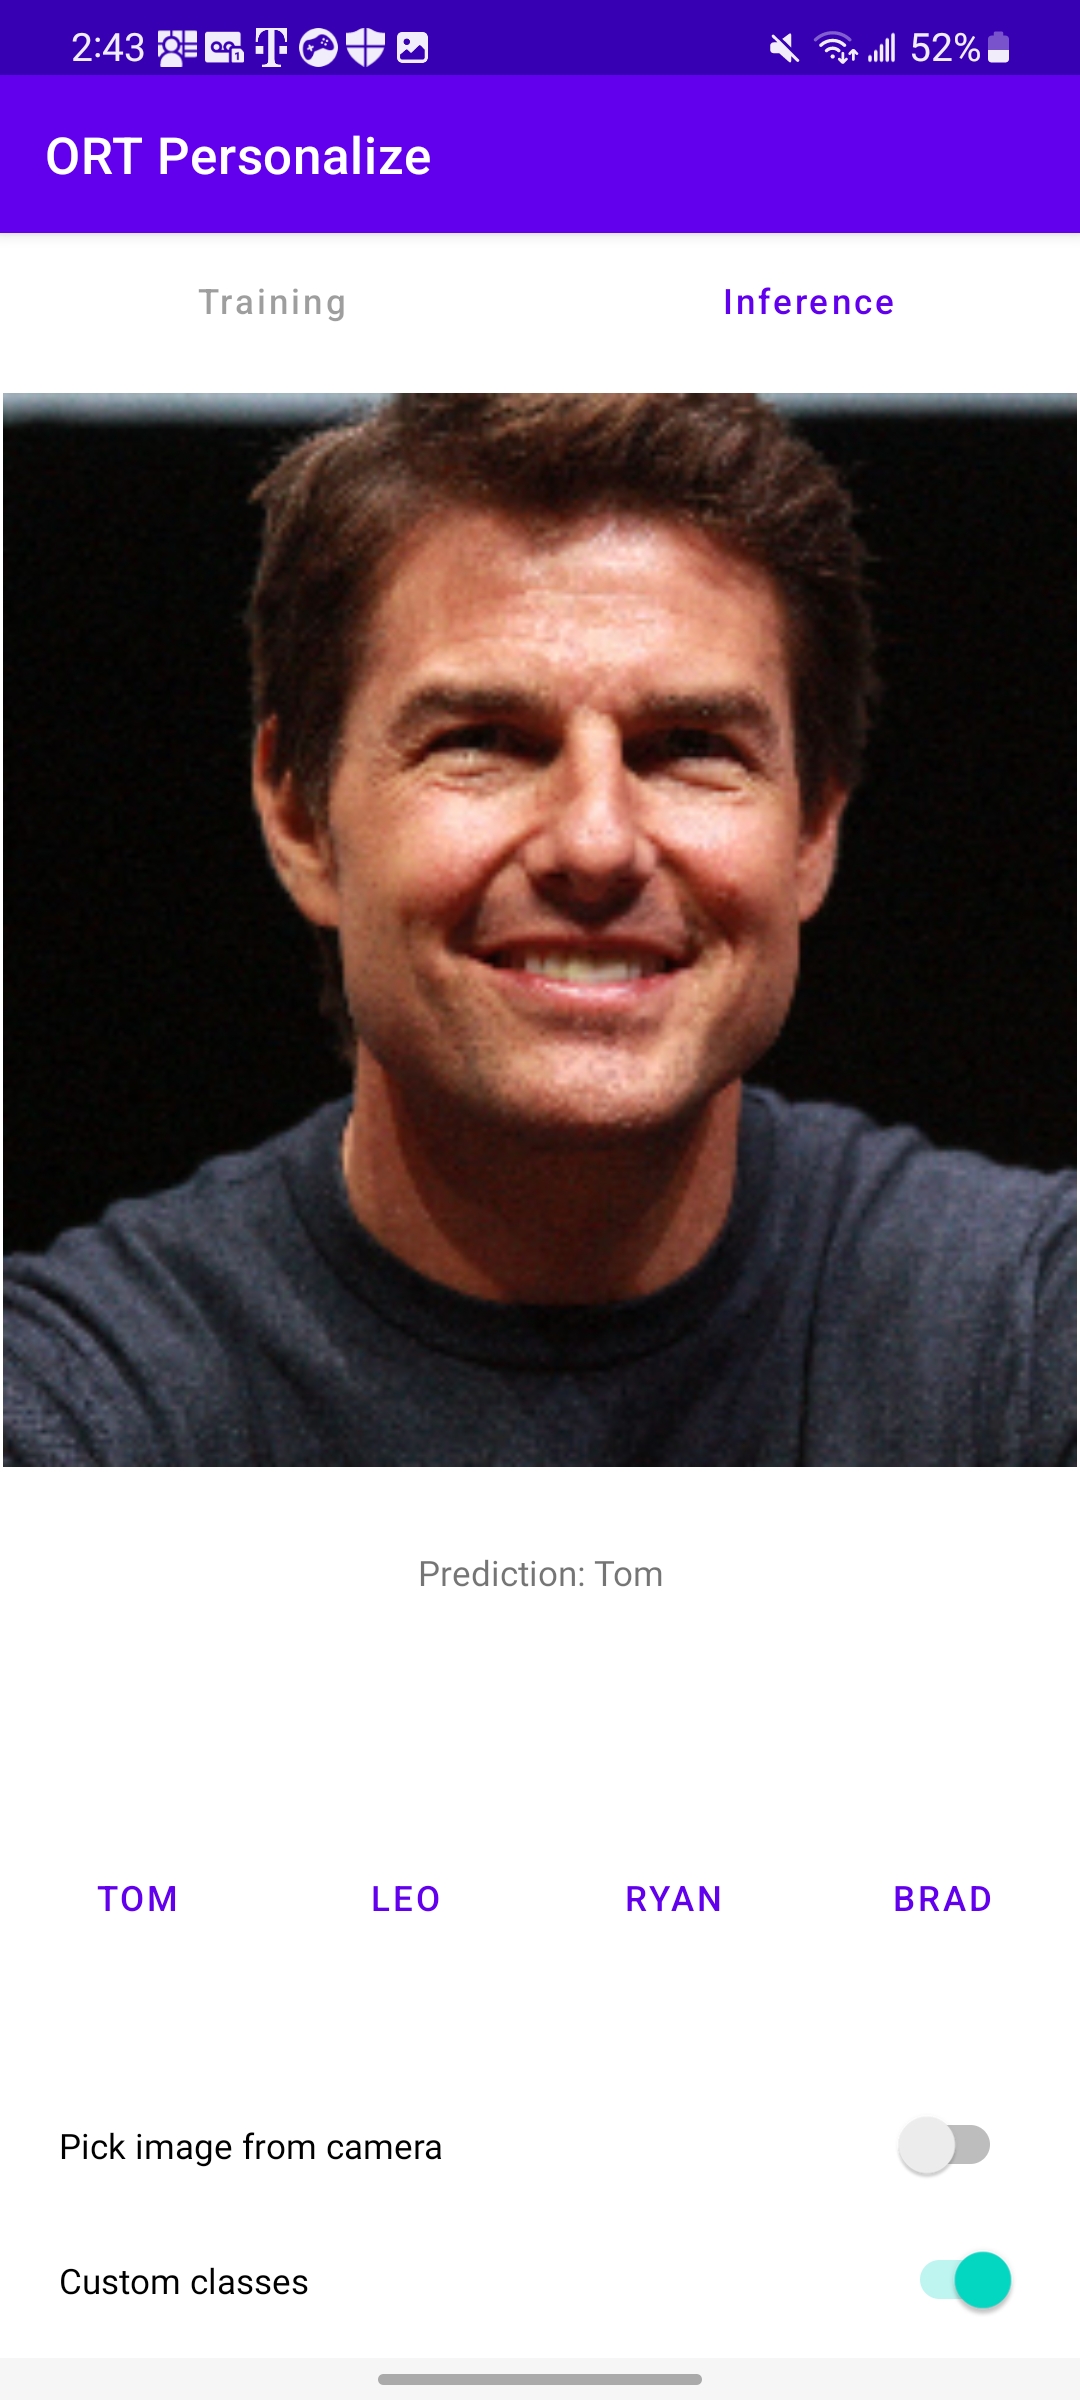
本教程結束時,應用程式將如下圖所示
簡介
我們將指導您完成建立 Android 應用程式的步驟,該應用程式可以使用裝置端訓練技術訓練一個簡單的影像分類模型。本教程展示了遷移學習技術,即利用從一項任務中訓練模型獲得的知識來提高模型在不同但相關任務上的效能。遷移學習允許我們將預訓練模型學到的知識或特徵遷移到新任務,而不是從頭開始學習過程。
在本教程中,我們將利用 MobileNetV2 模型,該模型已在 ImageNet 等大型影像資料集(包含 1,000 個類別)上進行訓練。我們將使用此模型將自定義資料分類到四個類別中的一個。MobileNetV2 的初始層作為特徵提取器,捕獲適用於各種任務的通用視覺特徵,而只有最終的分類器層將針對手頭的任務進行訓練。
在本教程中,我們將使用資料來學習
- 使用預打包的動物資料集將動物分類到四個類別中的一個。
- 使用自定義名人資料集將名人分類到四個類別中的一個。
目錄
先決條件
要學習本教程,您應該對使用 Java 或 Kotlin 進行 Android 應用程式開發有基本的瞭解。熟悉 C++ 以及機器學習概念(如神經網路和影像分類)也將有所幫助。
- 用於準備訓練工件的 Python 開發環境
- Android Studio 4.1+
- Android SDK 29+
- Android NDK r21+
- 一臺已啟用 開發者模式 並開啟 USB 除錯的 Android 裝置,帶攝像頭
注意 整個 Android 應用程式也已在
onnxruntime-training-examplesGitHub 倉庫中提供。
離線階段 - 構建訓練工件
-
我們從預訓練的 PyTorch 模型開始,並將其匯出為 ONNX。
MobileNetV2模型已在 Imagenet 資料集上進行了預訓練,該資料集包含 1000 個類別的資料。對於我們的影像分類任務,我們只想對 4 個類別中的影像進行分類。因此,我們將模型的最後一層更改為輸出 4 個 logits,而不是 1,000 個。有關如何將 PyTorch 模型匯出為 ONNX 的更多詳細資訊,請參見此處。
import torch import torchvision model = torchvision.models.mobilenet_v2( weights=torchvision.models.MobileNet_V2_Weights.IMAGENET1K_V2) # The original model is trained on imagenet which has 1000 classes. # For our image classification scenario, we need to classify among 4 categories. # So we need to change the last layer of the model to have 4 outputs. model.classifier[1] = torch.nn.Linear(1280, 4) # Export the model to ONNX. model_name = "mobilenetv2" torch.onnx.export(model, torch.randn(1, 3, 224, 224), f"training_artifacts/{model_name}.onnx", input_names=["input"], output_names=["output"], dynamic_axes={"input": {0: "batch"}, "output": {0: "batch"}}) -
import onnx # Load the onnx model. onnx_model = onnx.load(f"training_artifacts/{model_name}.onnx") # Define the parameters that require their gradients to be computed # (trainable parameters) and those that do not (frozen/non trainable parameters). requires_grad = ["classifier.1.weight", "classifier.1.bias"] frozen_params = [ param.name for param in onnx_model.graph.initializer if param.name not in requires_grad ] -
在本教程中,我們將使用
CrossEntropyLoss損失函式和AdamW最佳化器。有關工件生成的更多詳細資訊,請參見此處。from onnxruntime.training import artifacts # Generate the training artifacts. artifacts.generate_artifacts( onnx_model, requires_grad=requires_grad, frozen_params=frozen_params, loss=artifacts.LossType.CrossEntropyLoss, optimizer=artifacts.OptimType.AdamW, artifact_directory="training_artifacts" )就這樣!訓練工件已生成到
training_artifacts資料夾中。這標誌著離線階段的結束。這些工件已準備好部署到 Android 裝置進行訓練。
訓練階段 - Android 應用程式開發
-
a. 開啟 Android Studio,然後單擊
New Project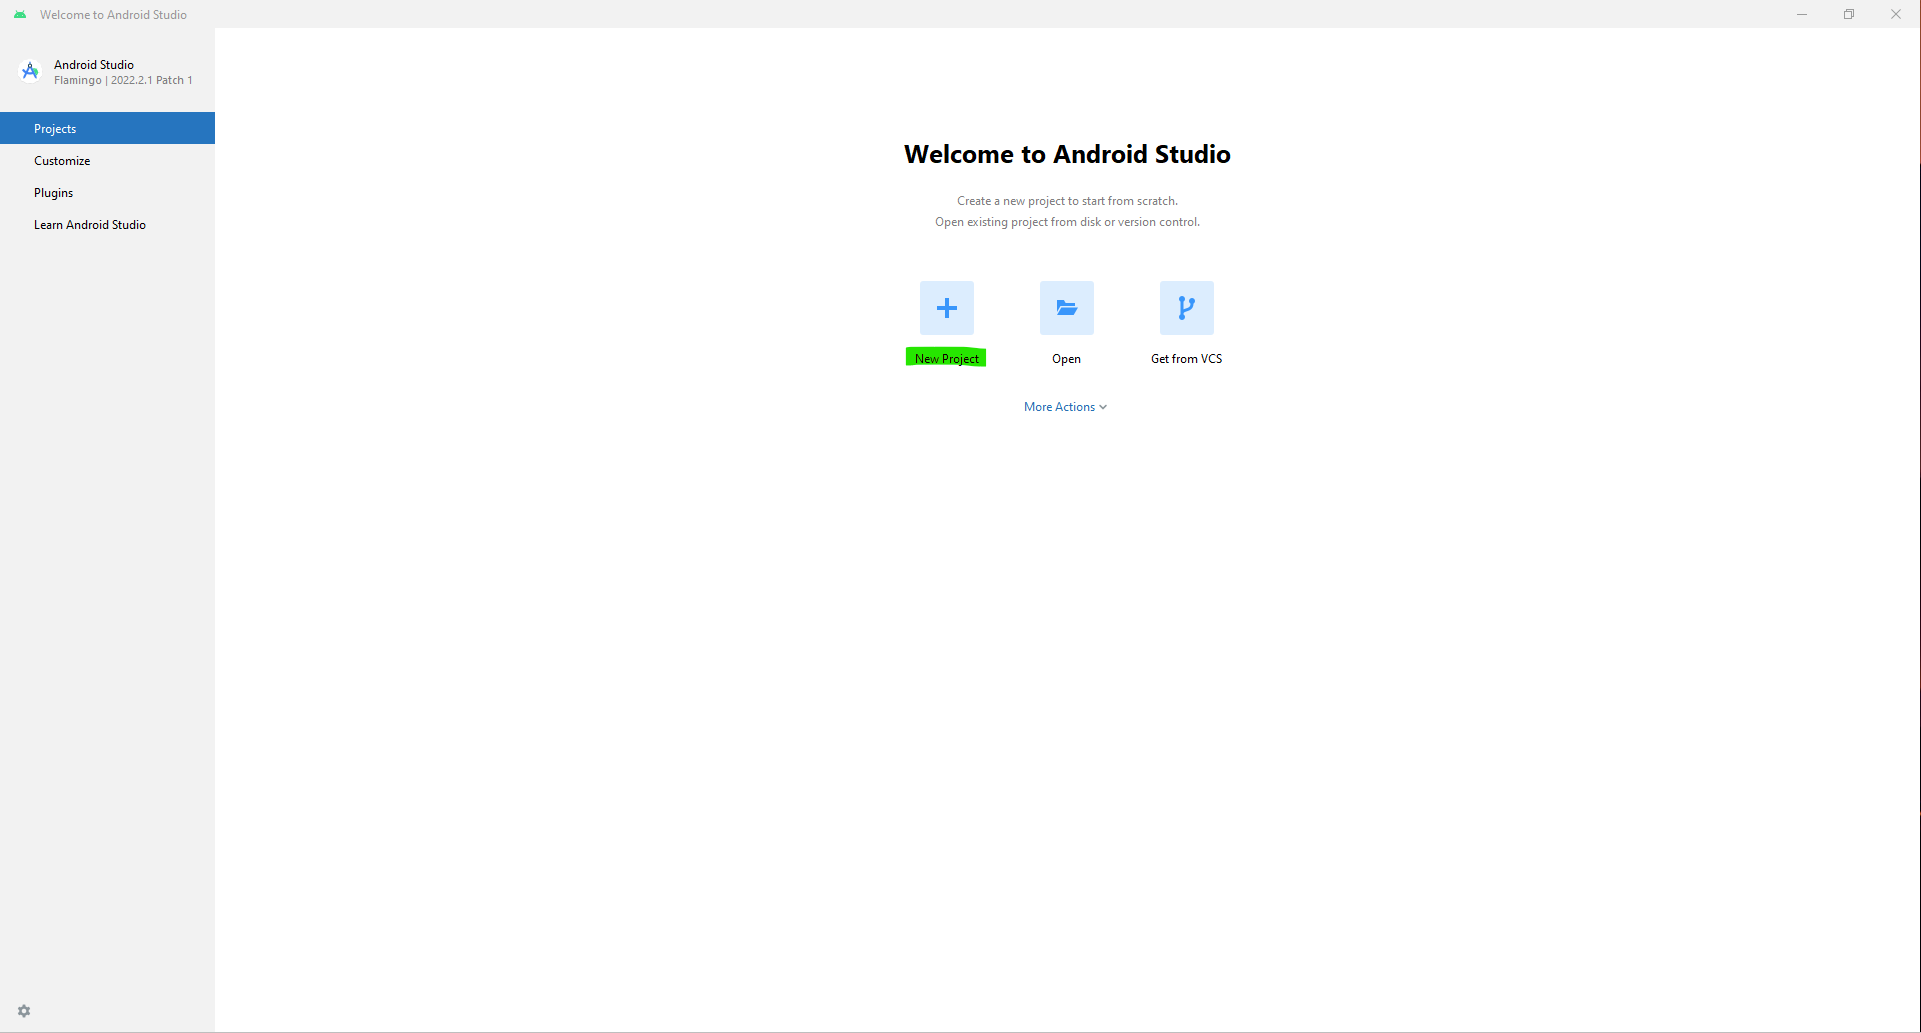
b. 單擊
Native C++->Next。填寫New Project詳細資訊如下- 名稱 -
ORT Personalize - 包名 -
com.example.ortpersonalize - 語言 -
Kotlin
單擊
Next。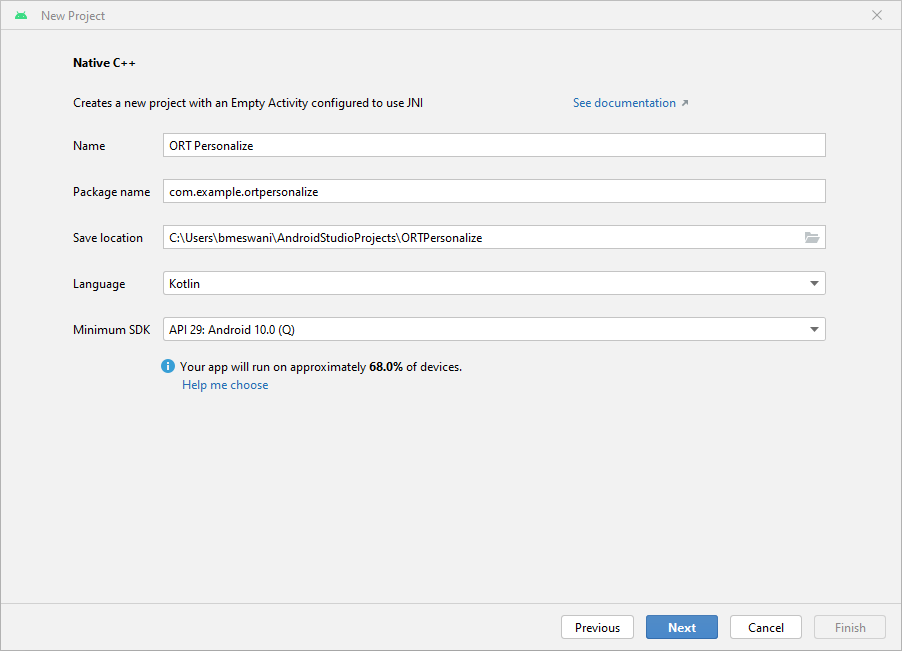
c. 選擇
C++17工具鏈 ->Finish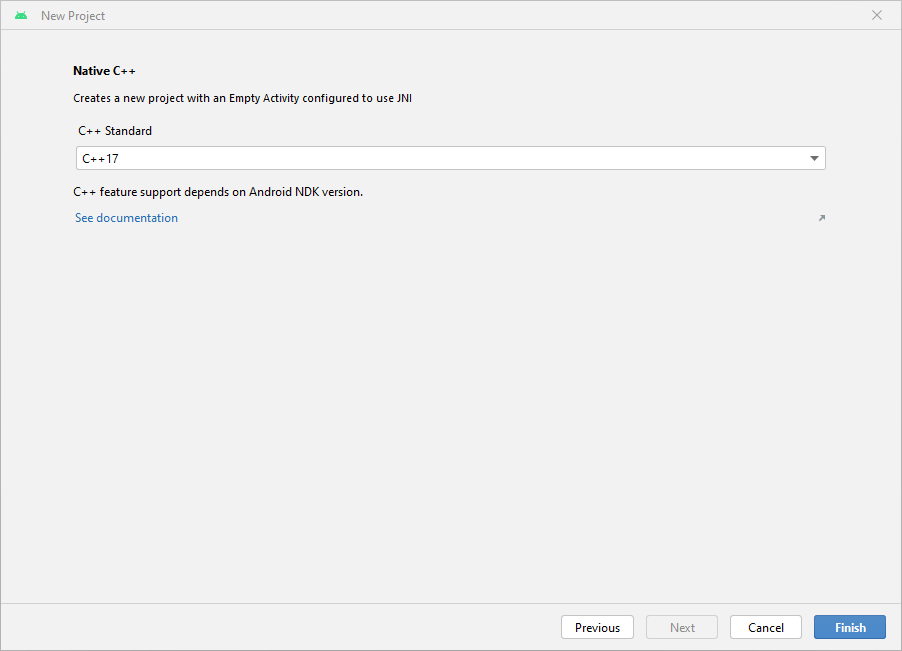
d. 完成!Android Studio 專案已設定完畢。您現在應該能夠看到帶有樣板程式碼的 Android Studio 編輯器。
- 名稱 -
-
a. 在 Android Studio 專案的 cpp 目錄下建立兩個新資料夾:
lib和include\onnxruntime。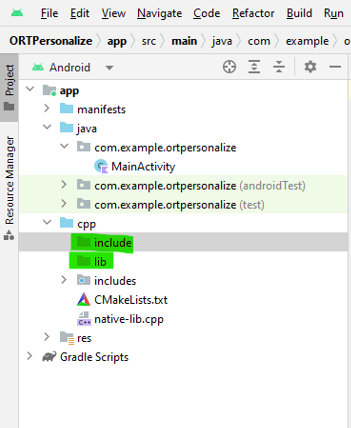
b. 訪問 Maven Central。前往
Versions->Browse-> 並下載onnxruntime-training-android歸檔包 (aar 檔案)。c. 將
aar副檔名重新命名為zip。因此,onnxruntime-training-android-1.15.0.aar變為onnxruntime-training-android-1.15.0.zip。d. 解壓 zip 檔案的內容。
e. 將
jni\arm64-v8a資料夾中的libonnxruntime.so共享庫複製到新建立的lib資料夾下的 Android 專案中。f. 將
headers資料夾的內容複製到新建立的include\onnxruntime資料夾中。g. 在
native-lib.cpp檔案中,包含訓練 cxx 標頭檔案。#include "onnxruntime_training_cxx_api.h"h. 將
abiFilters新增到build.gradle (Module)檔案中,以選擇arm64-v8a。此設定必須新增到build.gradle中的defaultConfig下。ndk { abiFilters 'arm64-v8a' }請注意,
build.gradle檔案的defaultConfig部分應如下所示defaultConfig { applicationId "com.example.ortpersonalize" minSdk 29 targetSdk 33 versionCode 1 versionName "1.0" testInstrumentationRunner "androidx.test.runner.AndroidJUnitRunner" externalNativeBuild { cmake { cppFlags '-std=c++17' } } + ndk { + abiFilters 'arm64-v8a' + } }i. 將
onnxruntime共享庫新增到CMakeLists.txt,以便cmake可以找到並針對該共享庫進行構建。為此,請在CMakeLists.txt中新增ortpersonalize庫之後新增以下行add_library(onnxruntime SHARED IMPORTED) set_target_properties(onnxruntime PROPERTIES IMPORTED_LOCATION ${CMAKE_SOURCE_DIR}/lib/libonnxruntime.so)透過在上述兩行之後新增以下行,讓
CMake知道 ONNX Runtime 標頭檔案在哪裡可以找到target_include_directories(ortpersonalize PRIVATE ${CMAKE_SOURCE_DIR}/include/onnxruntime)透過將
onnxruntime庫新增到target_link_libraries來將 Android C++ 專案與onnxruntime庫連結target_link_libraries( # Specifies the target library. ortpersonalize # Links the target library to the log library # included in the NDK. ${log-lib} onnxruntime)請注意,
CMakeLists.txt檔案應如下所示project("ortpersonalize") add_library( # Sets the name of the library. ortpersonalize # Sets the library as a shared library. SHARED # Provides a relative path to your source file(s). native-lib.cpp + utils.cpp + inference.cpp + train.cpp) + add_library(onnxruntime SHARED IMPORTED) + set_target_properties(onnxruntime PROPERTIES IMPORTED_LOCATION ${CMAKE_SOURCE_DIR}/lib/libonnxruntime.so) + target_include_directories(ortpersonalize PRIVATE ${CMAKE_SOURCE_DIR}/include/onnxruntime) find_library( # Sets the name of the path variable. log-lib # Specifies the name of the NDK library that # you want CMake to locate. log) target_link_libraries( # Specifies the target library. ortpersonalize # Links the target library to the log library # included in the NDK. ${log-lib} + onnxruntime)j. 構建應用程式並等待成功,以確認應用程式已包含 ONNX Runtime 標頭檔案並能成功連結到共享的 onnxruntime 庫。
-
a. 在 Android Studio 專案的左側面板中,右鍵單擊 app -> New -> Folder -> Assets Folder,並在 main 下建立一個名為
assets的新資料夾。b. 將步驟 2 中生成的訓練工件複製到此資料夾。
c. 現在,前往
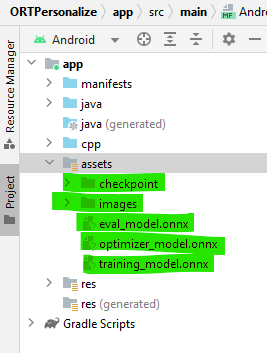
onnxruntime-training-examples倉庫,將資料集 (images.zip) 下載到您的機器並解壓。此資料集是在 Kaggle 上由 Corrado Alessio 建立的原始animals-10資料集的基礎上修改的。d. 將下載的
images資料夾複製到 Android Studio 的assets/images目錄中。專案的左側面板應如下所示
-
a. 我們將在 C++ 中實現以下四個函式,這些函式將從應用程式中呼叫
createSession:將在應用程式啟動時呼叫。它將建立新的CheckpointState和TrainingSession物件。releaseSession:將在應用程式即將關閉時呼叫。此函式將釋放應用程式啟動時分配的資源。performTraining:將在使用者單擊 UI 上的Train按鈕時呼叫。performInference:將在使用者單擊 UI 上的Infer按鈕時呼叫。
b. 建立會話
此函式在應用程式啟動時呼叫。它將使用訓練工件資源建立
C++CheckpointState 和 TrainingSession 物件。這些物件將用於在裝置上訓練模型。createSession的引數是checkpoint_path:檢查點工件的快取路徑。train_model_path:訓練模型工件的快取路徑。eval_model_path:評估模型工件的快取路徑。optimizer_model_path:最佳化器模型工件的快取路徑。cache_dir_path:Android 裝置上快取目錄的路徑。快取目錄用作從 C++ 程式碼訪問訓練工件的一種方式。
該函式返回一個
long,它表示指向session_cache物件的指標。每當我們想訪問訓練會話時,這個long都可以強制轉換為SessionCache。extern "C" JNIEXPORT jlong JNICALL Java_com_example_ortpersonalize_MainActivity_createSession( JNIEnv *env, jobject /* this */, jstring checkpoint_path, jstring train_model_path, jstring eval_model_path, jstring optimizer_model_path, jstring cache_dir_path) { std::unique_ptr<SessionCache> session_cache = std::make_unique<SessionCache>( utils::JString2String(env, checkpoint_path), utils::JString2String(env, train_model_path), utils::JString2String(env, eval_model_path), utils::JString2String(env, optimizer_model_path), utils::JString2String(env, cache_dir_path)); return reinterpret_cast<long>(session_cache.release()); }從上面的函式體可以看出,這個函式建立了一個
SessionCache類的物件的唯一指標。SessionCache的定義如下。struct SessionCache { ArtifactPaths artifact_paths; Ort::Env ort_env; Ort::SessionOptions session_options; Ort::CheckpointState checkpoint_state; Ort::TrainingSession training_session; Ort::Session* inference_session; SessionCache(const std::string &checkpoint_path, const std::string &training_model_path, const std::string &eval_model_path, const std::string &optimizer_model_path, const std::string& cache_dir_path) : artifact_paths(checkpoint_path, training_model_path, eval_model_path, optimizer_model_path, cache_dir_path), ort_env(ORT_LOGGING_LEVEL_WARNING, "ort personalize"), session_options(), checkpoint_state(Ort::CheckpointState::LoadCheckpoint(artifact_paths.checkpoint_path.c_str())), training_session(session_options, checkpoint_state, artifact_paths.training_model_path.c_str(), artifact_paths.eval_model_path.c_str(), artifact_paths.optimizer_model_path.c_str()), inference_session(nullptr) {} };ArtifactPaths的定義是struct ArtifactPaths { std::string checkpoint_path; std::string training_model_path; std::string eval_model_path; std::string optimizer_model_path; std::string cache_dir_path; std::string inference_model_path; ArtifactPaths(const std::string &checkpoint_path, const std::string &training_model_path, const std::string &eval_model_path, const std::string &optimizer_model_path, const std::string& cache_dir_path) : checkpoint_path(checkpoint_path), training_model_path(training_model_path), eval_model_path(eval_model_path), optimizer_model_path(optimizer_model_path), cache_dir_path(cache_dir_path), inference_model_path(cache_dir_path + "/inference.onnx") {} };c. 釋放會話
此函式在應用程式即將關閉時呼叫。它釋放應用程式啟動時建立的資源,主要是 CheckpointState 和 TrainingSession。
releaseSession的引數是session:代表SessionCache物件的long值。
extern "C" JNIEXPORT void JNICALL
Java_com_example_ortpersonalize_MainActivity_releaseSession(
      JNIEnv *env, jobject /* this */,
      jlong session) {
   auto *session_cache = reinterpret_cast<SessionCache *>(session);
   delete session_cache->inference_session;
   delete session_cache;
}
d. 執行訓練
此函式針對每個需要訓練的批次呼叫。訓練迴圈用 Kotlin 編寫在應用程式端,並且在訓練迴圈中,每次批次都會呼叫
performTraining函式。performTraining的引數是session:代表SessionCache物件的long值。batch:作為浮點陣列的輸入影像,用於訓練。labels:與提供用於訓練的輸入影像關聯的整數陣列形式的標籤。batch_size:每個TrainStep要處理的影像數量。channels:影像中的通道數。在我們的示例中,此值始終為3。frame_rows:影像中的行數。在我們的示例中,此值始終為224。frame_cols:影像中的列數。在我們的示例中,此值始終為224。
該函式返回一個
float,表示該批次的訓練損失。extern "C" JNIEXPORT float JNICALL Java_com_example_ortpersonalize_MainActivity_performTraining( JNIEnv *env, jobject /* this */, jlong session, jfloatArray batch, jintArray labels, jint batch_size, jint channels, jint frame_rows, jint frame_cols) { auto* session_cache = reinterpret_cast<SessionCache *>(session); if (session_cache->inference_session) { // Invalidate the inference session since we will be updating the model parameters // in train_step. // The next call to inference session will need to recreate the inference session. delete session_cache->inference_session; session_cache->inference_session = nullptr; } // Update the model parameters using this batch of inputs. return training::train_step(session_cache, env->GetFloatArrayElements(batch, nullptr), env->GetIntArrayElements(labels, nullptr), batch_size, channels, frame_rows, frame_cols); }上述函式利用了
train_step函式。train_step函式的定義如下namespace training { float train_step(SessionCache* session_cache, float *batches, int32_t *labels, int64_t batch_size, int64_t image_channels, int64_t image_rows, int64_t image_cols) { const std::vector<int64_t> input_shape({batch_size, image_channels, image_rows, image_cols}); const std::vector<int64_t> labels_shape({batch_size}); Ort::MemoryInfo memory_info = Ort::MemoryInfo::CreateCpu(OrtArenaAllocator, OrtMemTypeDefault); std::vector<Ort::Value> user_inputs; // {inputs, labels} // Inputs batched user_inputs.emplace_back(Ort::Value::CreateTensor(memory_info, batches, batch_size * image_channels * image_rows * image_cols * sizeof(float), input_shape.data(), input_shape.size(), ONNX_TENSOR_ELEMENT_DATA_TYPE_FLOAT)); // Labels batched user_inputs.emplace_back(Ort::Value::CreateTensor(memory_info, labels, batch_size * sizeof(int32_t), labels_shape.data(), labels_shape.size(), ONNX_TENSOR_ELEMENT_DATA_TYPE_INT32)); // Run the train step and execute the forward + loss + backward. float loss = *(session_cache->training_session.TrainStep(user_inputs).front().GetTensorMutableData<float>()); // Update the model parameters by taking a step in the direction of the gradients computed above. session_cache->training_session.OptimizerStep(); // Reset the gradients now that the parameters have been updated. // New set of gradients can then be computed for the next round of inputs. session_cache->training_session.LazyResetGrad(); return loss; } } // namespace traininge. 執行推理
當用戶想要執行推理時,將呼叫此函式。
performInference的引數是session:代表SessionCache物件的long值。image_buffer:作為浮點陣列的輸入影像,用於訓練。batch_size:每次推理要處理的影像數量。在我們的示例中,此值始終為1。image_channels:影像中的通道數。在我們的示例中,此值始終為3。image_rows:影像中的行數。在我們的示例中,此值始終為224。image_cols:影像中的列數。在我們的示例中,此值始終為224。classes:表示所有四個自定義類別的字串列表。
該函式返回一個
string,表示所提供的四個自定義類別之一。這是模型的預測結果。extern "C" JNIEXPORT jstring JNICALL Java_com_example_ortpersonalize_MainActivity_performInference( JNIEnv *env, jobject /* this */, jlong session, jfloatArray image_buffer, jint batch_size, jint image_channels, jint image_rows, jint image_cols, jobjectArray classes) { std::vector<std::string> classes_str; for (int i = 0; i < env->GetArrayLength(classes); ++i) { // Access the current string element jstring elem = static_cast<jstring>(env->GetObjectArrayElement(classes, i)); classes_str.push_back(utils::JString2String(env, elem)); } auto* session_cache = reinterpret_cast<SessionCache *>(session); if (!session_cache->inference_session) { // The inference session does not exist, so create a new one. session_cache->training_session.ExportModelForInferencing( session_cache->artifact_paths.inference_model_path.c_str(), {"output"}); session_cache->inference_session = std::make_unique<Ort::Session>( session_cache->ort_env, session_cache->artifact_paths.inference_model_path.c_str(), session_cache->session_options).release(); } auto prediction = inference::classify( session_cache, env->GetFloatArrayElements(image_buffer, nullptr), batch_size, image_channels, image_rows, image_cols, classes_str); return env->NewStringUTF(prediction.first.c_str()); }上述函式呼叫了
classify。classify 的定義是namespace inference { std::pair<std::string, float> classify(SessionCache* session_cache, float *image_data, int64_t batch_size, int64_t image_channels, int64_t image_rows, int64_t image_cols, const std::vector<std::string>& classes) { std::vector<const char *> input_names = {"input"}; size_t input_count = 1; std::vector<const char *> output_names = {"output"}; size_t output_count = 1; std::vector<int64_t> input_shape({batch_size, image_channels, image_rows, image_cols}); Ort::MemoryInfo memory_info = Ort::MemoryInfo::CreateCpu(OrtArenaAllocator, OrtMemTypeDefault); std::vector<Ort::Value> input_values; // {input images} input_values.emplace_back(Ort::Value::CreateTensor(memory_info, image_data, batch_size * image_channels * image_rows * image_cols * sizeof(float), input_shape.data(), input_shape.size(), ONNX_TENSOR_ELEMENT_DATA_TYPE_FLOAT)); std::vector<Ort::Value> output_values; output_values.emplace_back(nullptr); // get the logits session_cache->inference_session->Run(Ort::RunOptions(), input_names.data(), input_values.data(), input_count, output_names.data(), output_values.data(), output_count); float *output = output_values.front().GetTensorMutableData<float>(); // run softmax and get the probabilities of each class std::vector<float> probabilities = Softmax(output, classes.size()); size_t best_index = std::distance(probabilities.begin(), std::max_element(probabilities.begin(), probabilities.end())); return {classes[best_index], probabilities[best_index]}; } } // namespace inferenceclassify 函式呼叫另一個名為
Softmax的函式。Softmax的定義是std::vector<float> Softmax(float *logits, size_t num_logits) { std::vector<float> probabilities(num_logits, 0); float sum = 0; for (size_t i = 0; i < num_logits; ++i) { probabilities[i] = exp(logits[i]); sum += probabilities[i]; } if (sum != 0.0f) { for (size_t i = 0; i < num_logits; ++i) { probabilities[i] /= sum; } } return probabilities; } -
a.
MobileNetV2模型要求輸入的影像是- 大小為
3 x 224 x 224。 - 一個標準化影像,減去平均值
(0.485, 0.456, 0.406)併除以標準差(0.229, 0.224, 0.225)
此預處理在 Java/Kotlin 中使用 Android 提供的庫完成。
讓我們在
app/src/main/java/com/example/ortpersonalize目錄下建立一個名為ImageProcessingUtil.kt的新檔案。我們將在該檔案中新增用於裁剪、調整大小和規範化影像的實用方法。b. 裁剪和調整影像大小。
fun processBitmap(bitmap: Bitmap) : Bitmap {
   // This function processes the given bitmap by
   //   - cropping along the longer dimension to get a square bitmap
   //     If the width is larger than the height
   //     ___+_________________+___
   //     |  +                 +  |
   //     |  +                 +  |
   //     |  +        +        +  |
   //     |  +                 +  |
   //     |__+_________________+__|
   //     <-------- width -------->
   //        <----- height ---->
   //     <-->      cropped    <-->
   //
   //     If the height is larger than the width
   //     _________________________   ʌ            ʌ
   //     |                       |   |         cropped
   //     |+++++++++++++++++++++++|   |      ʌ     v
   //     |                       |   |      |
   //     |                       |   |      |
   //     |           +           | height width
   //     |                       |   |      |
   //     |                       |   |      |
   //     |+++++++++++++++++++++++|   |      v     ʌ
   //     |                       |   |         cropped
   //     |_______________________|   v            v
   //
   //
   //
   //   - resizing the cropped square image to be of size (3 x 224 x 224) as needed by the
   //     mobilenetv2 model.
   lateinit var bitmapCropped: Bitmap
   if (bitmap.getWidth() >= bitmap.getHeight()) {
      // Since height is smaller than the width, we crop a square whose length is the height
      // So cropping happens along the width dimesion
      val width: Int = bitmap.getHeight()
      val height: Int = bitmap.getHeight()

      // left side of the cropped image must begin at (bitmap.getWidth() / 2 - bitmap.getHeight() / 2)
      // so that the cropped width contains equal portion of the width on either side of center
      // top side of the cropped image must begin at 0 since we are not cropping along the height
      // dimension
      val x: Int = bitmap.getWidth() / 2 - bitmap.getHeight() / 2
      val y: Int = 0
      bitmapCropped = Bitmap.createBitmap(bitmap, x, y, width, height)
   } else {
      // Since width is smaller than the height, we crop a square whose length is the width
      // So cropping happens along the height dimesion
      val width: Int = bitmap.getWidth()
      val height: Int = bitmap.getWidth()

      // left side of the cropped image must begin at 0 since we are not cropping along the width
      // dimension
      // top side of the cropped image must begin at (bitmap.getHeight() / 2 - bitmap.getWidth() / 2)
      // so that the cropped height contains equal portion of the height on either side of center
      val x: Int = 0
      val y: Int = bitmap.getHeight() / 2 - bitmap.getWidth() / 2
      bitmapCropped = Bitmap.createBitmap(bitmap, x, y, width, height)
   }

   // Resize the image to be channels x width x height as needed by the mobilenetv2 model
   val width: Int = 224
   val height: Int = 224
   val bitmapResized: Bitmap = Bitmap.createScaledBitmap(bitmapCropped, width, height, false)

   return bitmapResized
}
c. 規範化影像。
fun processImage(bitmap: Bitmap, buffer: FloatBuffer, offset: Int) {
   // This function iterates over the image and performs the following
   // on the image pixels
   //   - normalizes the pixel values to be between 0 and 1
   //   - substracts the mean (0.485, 0.456, 0.406) (derived from the mobilenetv2 model configuration)
   //     from the pixel values
   //   - divides by pixel values by the standard deviation (0.229, 0.224, 0.225) (derived from the
   //     mobilenetv2 model configuration)
   // Values are written to the given buffer starting at the provided offset.
   // Values are written as follows
   // |____|____________________|__________________| <--- buffer
   //      ʌ                                         <--- offset
   //                           ʌ                    <--- offset + width * height * channels
   // |____|rrrrrr|_____________|__________________| <--- red channel read in column major order
   // |____|______|gggggg|______|__________________| <--- green channel read in column major order
   // |____|______|______|bbbbbb|__________________| <--- blue channel read in column major order

   val width: Int = bitmap.getWidth()
   val height: Int = bitmap.getHeight()
   val stride: Int = width * height

   for (x in 0 until width) {
      for (y in 0 until height) {
            val color: Int = bitmap.getPixel(y, x)
            val index = offset + (x * height + y)

            // Subtract the mean and divide by the standard deviation
            // Values for mean and standard deviation used for
            // the movilenetv2 model.
            buffer.put(index + stride * 0, ((Color.red(color).toFloat() / 255f) - 0.485f) / 0.229f)
            buffer.put(index + stride * 1, ((Color.green(color).toFloat() / 255f) - 0.456f) / 0.224f)
            buffer.put(index + stride * 2, ((Color.blue(color).toFloat() / 255f) - 0.406f) / 0.225f)
      }
   }
}
d. 從 Uri 獲取 Bitmap
fun bitmapFromUri(uri: Uri, contentResolver: ContentResolver): Bitmap { // This function reads the image file at the given uri and decodes it to a bitmap val source: ImageDecoder.Source = ImageDecoder.createSource(contentResolver, uri) return ImageDecoder.decodeBitmap(source).copy(Bitmap.Config.ARGB_8888, true) } - 大小為
-
a. 對於本教程,我們將使用以下使用者介面元素
- 訓練和推理按鈕
- 類別按鈕
- 狀態訊息文字
- 影像顯示
- 進度對話方塊
b. 本教程不打算展示如何建立圖形使用者介面。因此,我們只需重複使用 GitHub 上提供的檔案。
c. 將
strings.xml中的所有字串定義複製到您的 Android Studio 本地的strings.xml檔案中。d. 將
activity_main.xml的內容複製到您的 Android Studio 本地的activity_main.xml檔案中。e. 在
layout資料夾下建立一個名為dialog.xml的新檔案。將dialog.xml的內容複製到您 Android Studio 本地新建的dialog.xml中。f. 本節中剩餘的更改需要在 MainActivity.kt 檔案中進行。
g. 啟動應用程式
當應用程式啟動時,將呼叫
onCreate函式。此函式負責設定會話快取和使用者介面處理程式。有關程式碼,請參閱
MainActivity.kt檔案中的onCreate函式。h. 自定義類別按鈕處理程式 - 我們希望使用類別按鈕讓使用者選擇他們的自定義影像進行訓練。我們需要為這些按鈕新增監聽器以實現此目的。這些監聽器將精確地完成這項工作。
請參考
MainActivity.kt中的這些按鈕處理程式- onClassAClickedListener
- onClassBClickedListener
- onClassXClickedListener
- onClassYClickedListener
i. 個性化自定義類別標籤
預設情況下,自定義類別標籤是
[A, B, X, Y]。但是,讓我們允許使用者為清晰起見重新命名這些標籤。這透過長按監聽器實現(在MainActivity.kt中定義)- onClassALongClickedListener
- onClassBLongClickedListener
- onClassXLongClickedListener
- onClassYLongClickedListener
j. 切換自定義類別。
當自定義類別開關關閉時,執行預打包的動物資料集。當開關開啟時,使用者需要提供自己的資料集進行訓練。為了處理這種轉換,
onCustomClassSettingChangedListener開關處理程式在MainActivity.kt中實現。k. 訓練處理程式
當每個類別至少有 1 張影像時,可以啟用
Train按鈕。單擊Train按鈕時,將針對選定的影像啟動訓練。訓練處理程式負責- 將訓練影像收集到一個容器中。
- 打亂影像的順序。
- 裁剪和調整影像大小。
- 歸一化影像。
- 對影像進行批處理。
- 執行訓練迴圈(迴圈呼叫 C++
performTraining函式)。
MainActivity.kt中定義的onTrainButtonClickedListener函式完成上述操作。l. 推理處理程式
訓練完成後,使用者可以點選
Infer按鈕來推理任何影像。推理處理程式負責- 收集推理影像。
- 裁剪和調整影像大小。
- 歸一化影像。
- 呼叫 C++
performInference函式。 - 向用戶介面報告推理輸出。
這透過
MainActivity.kt中的onInferenceButtonClickedListener函式實現。m. 上述所有活動的處理程式
一旦為推理或自定義類別選擇了影像,就需要對其進行處理。
MainActivity.kt中定義的onActivityResult函式執行此操作。n. 最後一件事。在
AndroidManifest.xml檔案中新增以下內容以使用攝像頭<uses-permission android:name="android.permission.CAMERA" /> <uses-feature android:name="android.hardware.camera" />
訓練階段 - 在裝置上執行應用程式
-
a. 讓我們將 Android 裝置連線到機器並在裝置上執行應用程式。
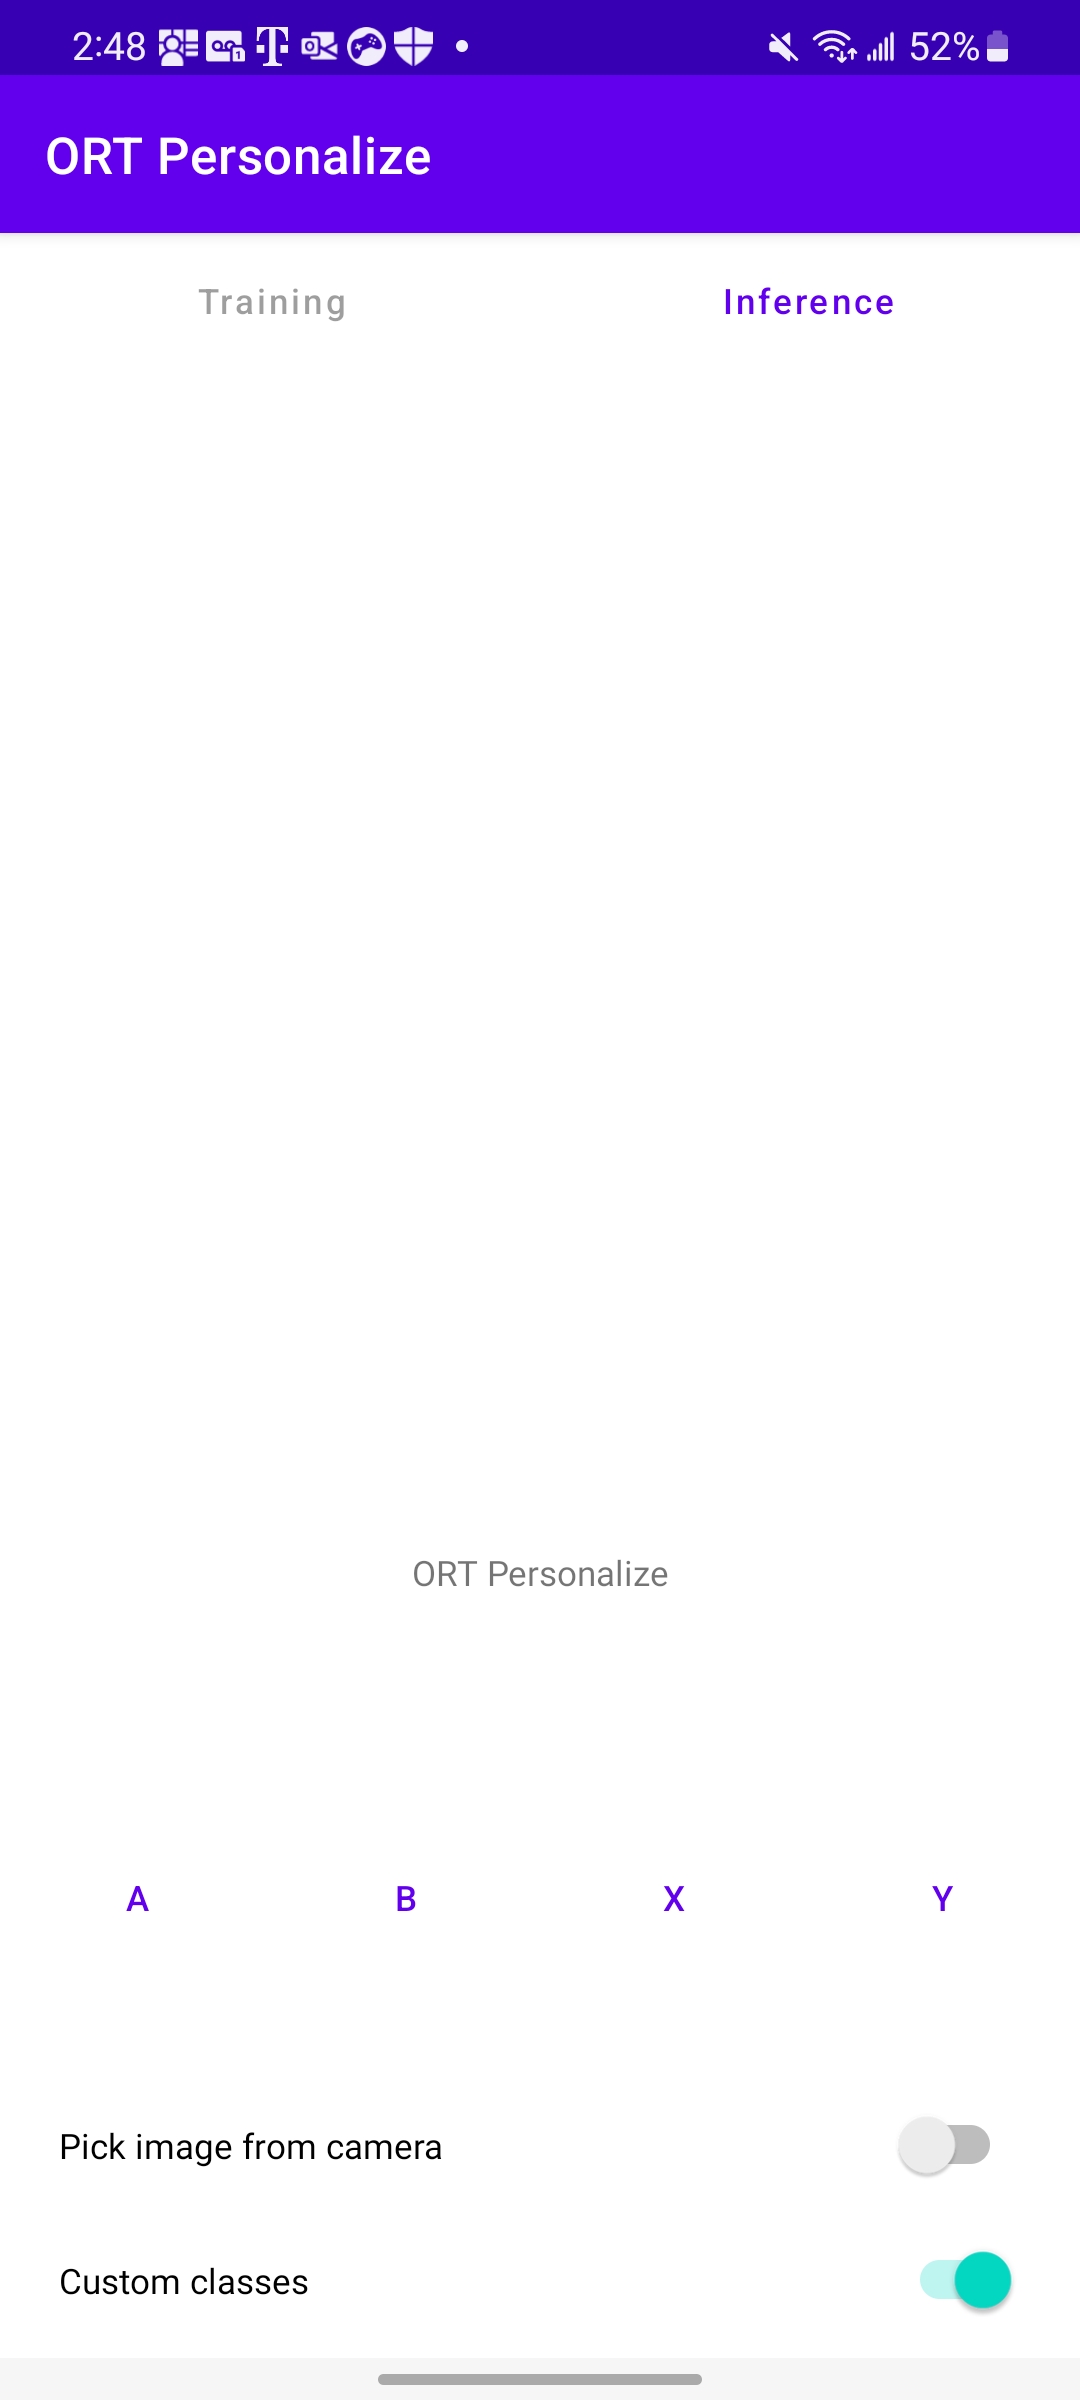
b. 在裝置上啟動應用程式應該看起來像這樣
-
a. 讓我們透過在裝置上啟動應用程式,開始使用預載入的動物資料集進行訓練。
b. 切換底部的
Custom classes開關。c. 類別標籤將更改為
Dog、Cat、Elephant和Cow。d. 執行
Training並等待進度對話方塊消失(訓練完成後)。e. 現在使用您相簿中的任何動物影像進行推理。
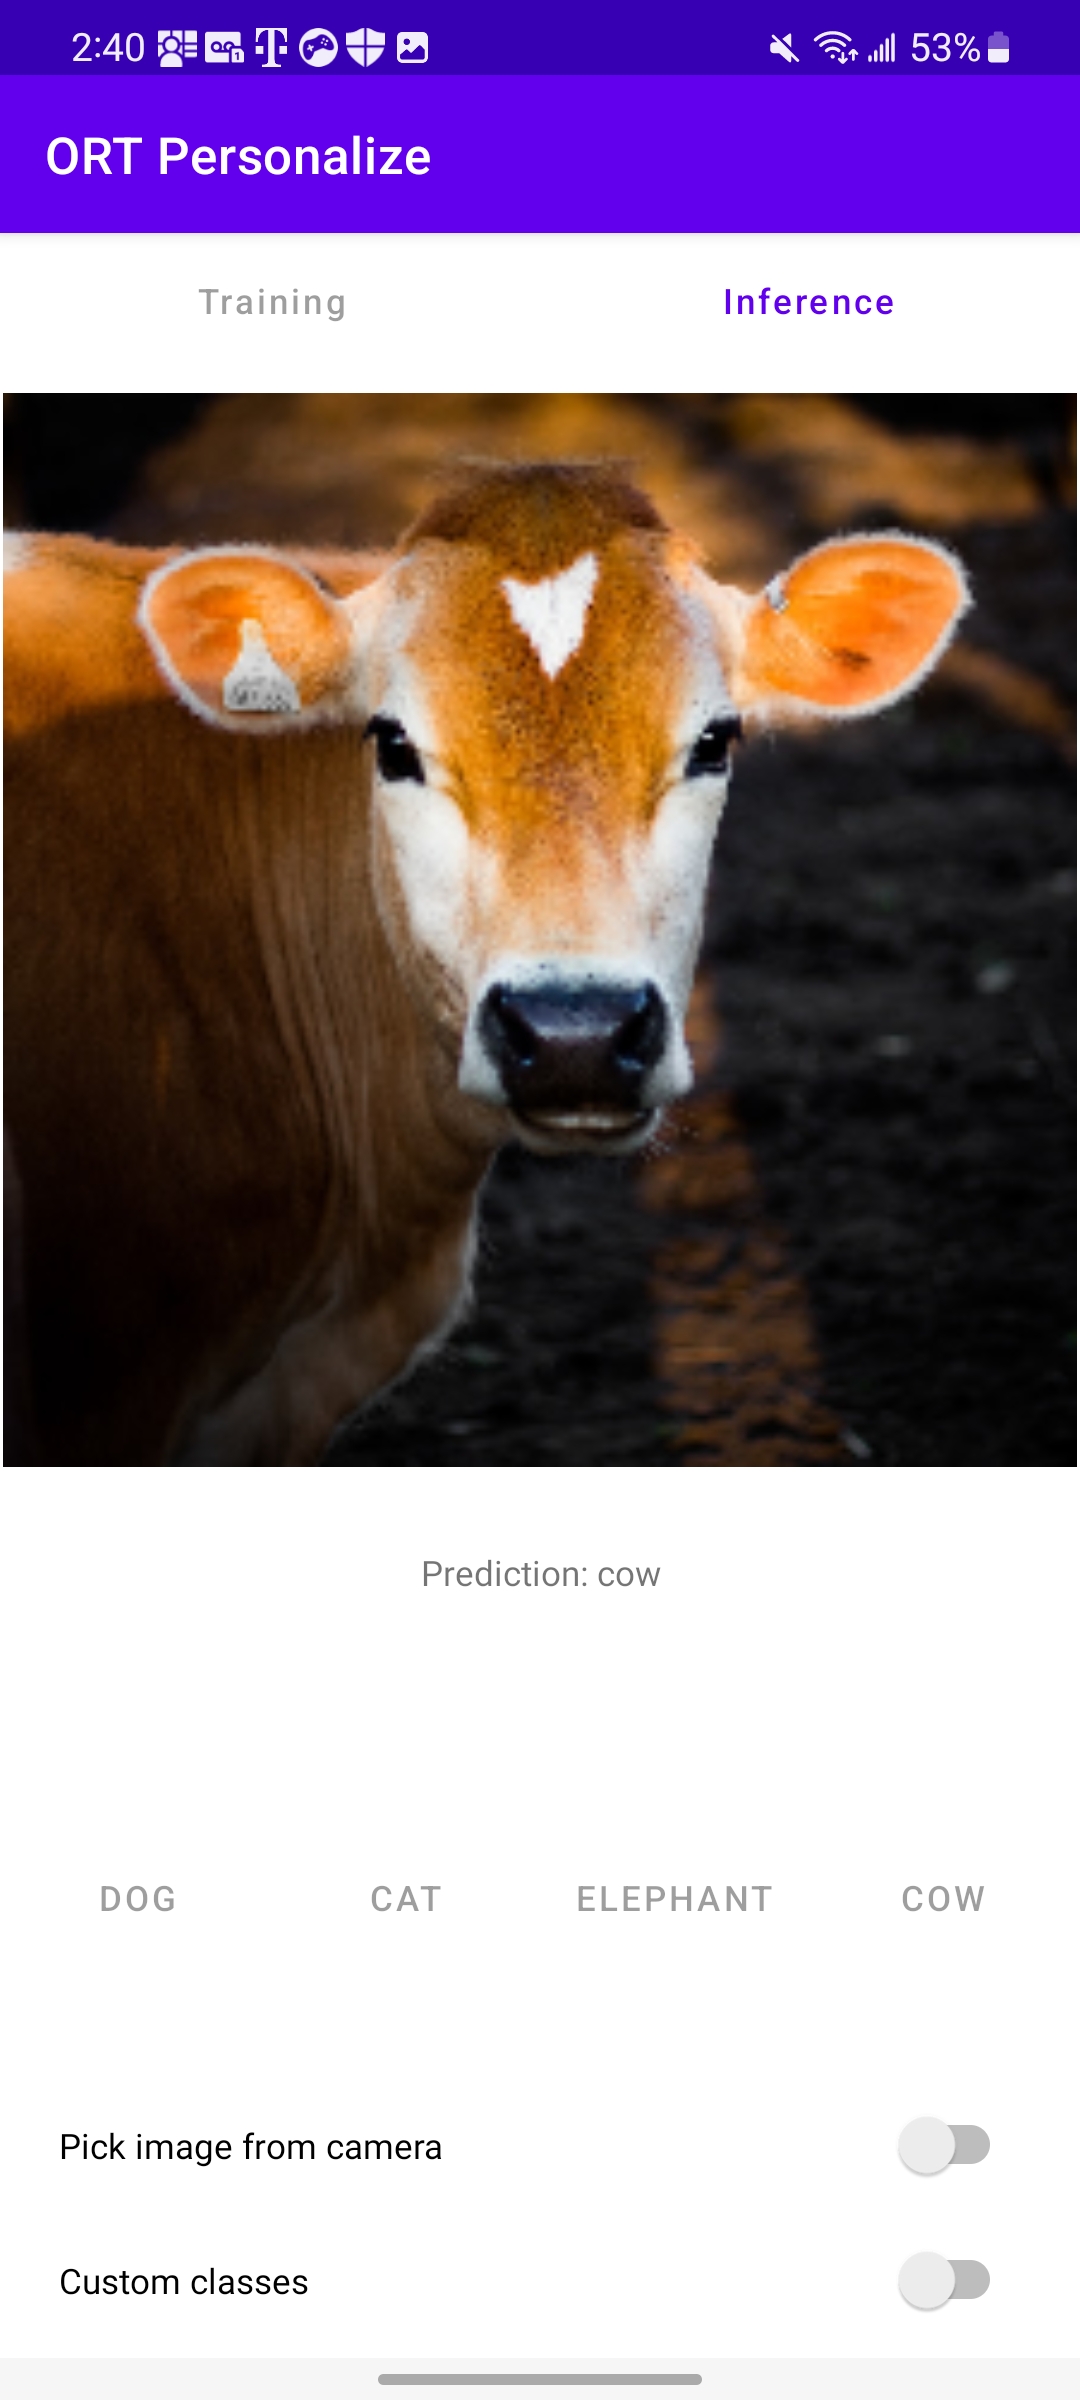
從上圖可以看出,模型正確預測為
Cow。 -
a. 從網上下載湯姆·克魯斯 (Tom Cruise)、萊昂納多·迪卡普里奧 (Leonardo DiCaprio)、瑞安·雷諾茲 (Ryan Reynolds) 和布拉德·皮特 (Brad Pitt) 的影像。
b. 確保透過關閉並重新啟動應用程式來啟動一個新的應用程式會話。
c. 應用程式啟動後,透過長按將四個類別分別重新命名為
Tom、Leo、Ryan、Brad。d. 點選每個類別的按鈕,並選擇與該名人相關的影像。每個類別我們可以使用大約 10~15 張影像。
e. 點選
Train按鈕,讓應用程式從提供的資料中學習。f. 訓練完成後,我們可以點選
Infer按鈕並提供應用程式尚未見過的影像。g. 就這樣!希望應用程式正確分類了影像。
結論
恭喜!您已成功構建了一個 Android 應用程式,該應用程式使用 ONNX Runtime 在裝置上學習影像分類。該應用程式也已在 GitHub 上提供,地址為 onnxruntime-training-examples。