構建 iOS 應用程式
在本教程中,我們將探討如何構建一個結合了 ONNX Runtime 裝置端訓練解決方案的 iOS 應用程式。裝置端訓練指的是直接在邊緣裝置上訓練機器學習模型,而無需依賴雲服務或外部伺服器的過程。
在本教程中,我們將構建一個簡單的說話人識別應用程式,它能學會識別說話人的聲音。我們將瞭解如何在裝置上訓練模型、匯出訓練好的模型,以及如何使用訓練好的模型執行推理。
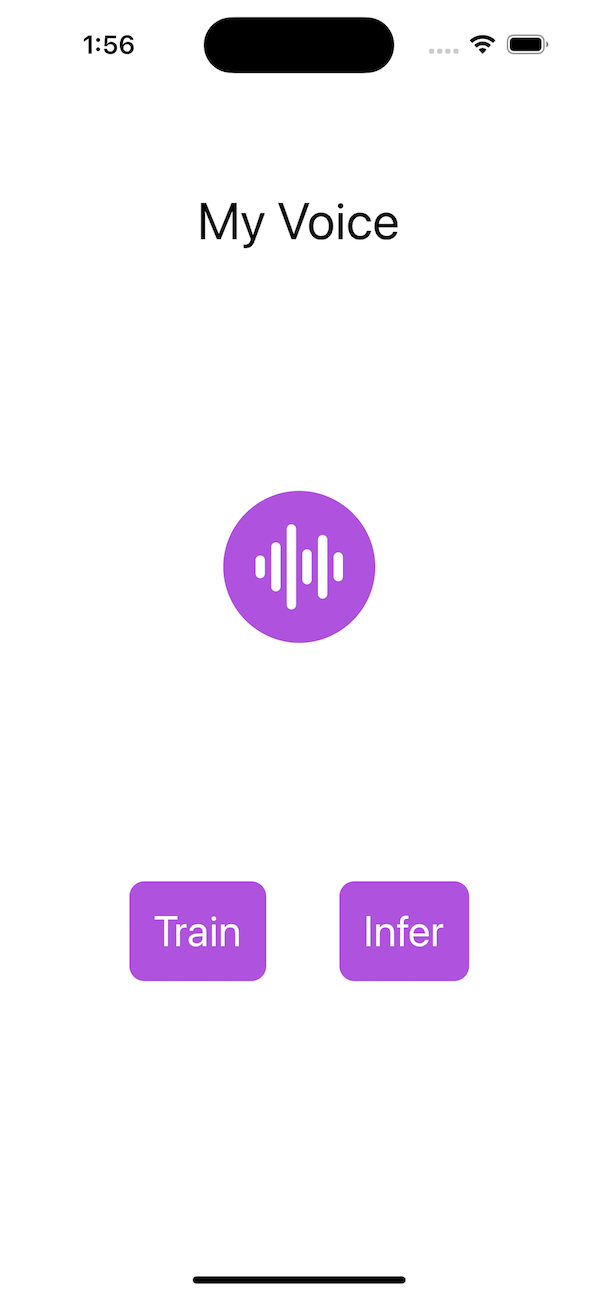
應用程式的外觀將如下所示:
簡介
我們將指導您構建一個 iOS 應用程式,該應用程式可以使用裝置端訓練技術訓練一個簡單的音訊分類模型。本教程展示了遷移學習技術,即利用從一個任務中獲得的知識來提高模型在不同但相關任務上的效能。遷移學習不是從頭開始學習過程,而是允許我們將預訓練模型學到的知識或特徵遷移到新任務上。
在本教程中,我們將利用 wav2vec 模型,該模型已在大型名人語音資料(如 VoxCeleb1)上進行訓練。我們將使用預訓練模型從音訊資料中提取特徵,並訓練一個二元分類器來識別說話人。模型的初始層作為特徵提取器,捕獲音訊資料的重要特徵。只有模型的最後一層被訓練來執行分類任務。
在本教程中,我們將:
- 使用 iOS 音訊 API 捕獲用於訓練的音訊資料
- 在裝置上訓練模型
- 匯出訓練好的模型
- 使用匯出的模型執行推理
目錄
先決條件
要繼續本教程,您應該對機器學習和 iOS 開發有基本的瞭解。您還需要在您的機器上安裝以下軟體:
注意: 完整的 iOS 應用程式也可在
onnxruntime-training-examplesGitHub 倉庫中找到。您可以克隆該倉庫並按照教程進行操作。
生成訓練工件
-
將模型匯出為 ONNX。
我們將從 HuggingFace 的預訓練模型開始,並將其匯出到 ONNX。
wav2vec模型已在包含 1000 多個類別的VoxCeleb1上進行預訓練。對於我們的任務,我們只需要將音訊分類為 2 個類別。因此,我們更改模型的最後一層以輸出 2 個類別。我們將使用transformers庫載入模型並將其匯出到 ONNX。from transformers import Wav2Vec2ForSequenceClassification, AutoConfig import torch # load config from the pretrained model config = AutoConfig.from_pretrained("superb/wav2vec2-base-superb-sid") model = Wav2Vec2ForSequenceClassification.from_pretrained("superb/wav2vec2-base-superb-sid") # modify last layer to output 2 classes model.classifier = torch.nn.Linear(256, 2) #export model to ONNX dummy_input = torch.randn(1, 160000, requires_grad=True) torch.onnx.export(model, dummy_input, "wav2vec.onnx",input_names=["input"], output_names=["output"], dynamic_axes={"input": {0: "batch"}, "output": {0: "batch"}}) -
定義可訓練和不可訓練的引數
import onnx # load the onnx model onnx_model = onnx.load("wav2vec.onnx") # Define the parameters that require gradients to be computed (trainable parameters) and # those that don't (frozen/non-trainable parameters) requires_grad = ["classifier.weight", "classifier.bias"] frozen_params = [ param.name for param in onnx_model.graph.initializer if param.name not in requires_grad ] -
生成訓練工件。
在本教程中,我們將使用
CrossEntropyLoss損失函式和AdamW最佳化器。有關工件生成的更多詳細資訊,請參見此處。由於模型還輸出 logits 和隱藏狀態,我們將使用
onnxblock來定義一個自定義損失函式,該函式從模型輸出中提取 logits 並將其傳遞給CrossEntropyLoss函式。import onnxruntime.training.onnxblock as onnxblock from onnxruntime.training import artifacts # define the loss function class CustomCELoss(onnxblock.Block): def __init__(self): super().__init__() self.celoss = onnxblock.loss.CrossEntropyLoss() def build(self, logits, *args): return self.celoss(logits) # Generate the training artifacts artifacts.generate_artifacts( onnx_model, requires_grad=requires_grad, frozen_params=frozen_params, loss=CustomCELoss(), optimizer=artifacts.OptimType.AdamW, artifact_directory="artifacts", )就這樣!訓練工件已生成在
artifacts目錄中。這些工件已準備好部署到 iOS 裝置進行訓練。
構建 iOS 應用程式
Xcode 設定
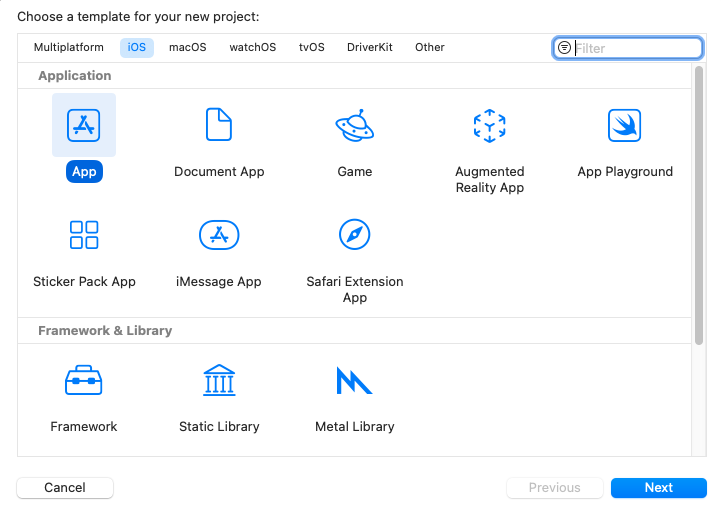
開啟 Xcode,建立一個新專案。選擇 iOS 作為平臺,App 作為模板。點選 Next。
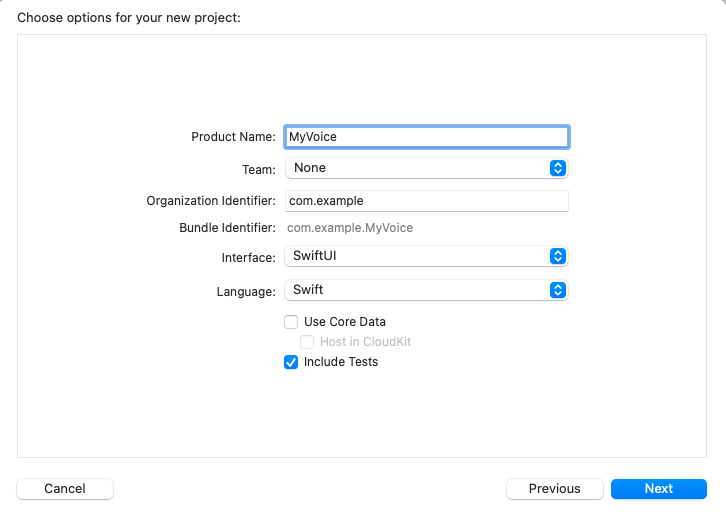
輸入專案名稱。這裡我們將專案命名為“MyVoice”,但您可以隨意命名。確保選擇 SwiftUI 作為介面,Swift 作為語言。然後,點選 Next。
選擇您要儲存專案的位置,然後點選 Create。
現在,我們需要將 onnxruntime-training-objc pod 新增到專案中。我們將使用 CocoaPods 來新增依賴項。如果您沒有安裝 CocoaPods,可以在此處檢視安裝說明。
安裝 CocoaPods 後,導航到專案目錄並執行以下命令以建立 Podfile
pod init
這將在專案目錄中建立一個 Podfile。開啟 Podfile 並在 use_frameworks! 行之後新增以下行:
pod `onnxruntime-training-objc`, `~> 1.16.0`
儲存 Podfile 並執行以下命令安裝依賴項:
pod install
這將會在專案目錄中建立一個 MyVoice.xcworkspace 檔案。在 Xcode 中開啟 xcworkspace 檔案。這將在 Xcode 中開啟專案,並使 CocoaPods 依賴項可用。
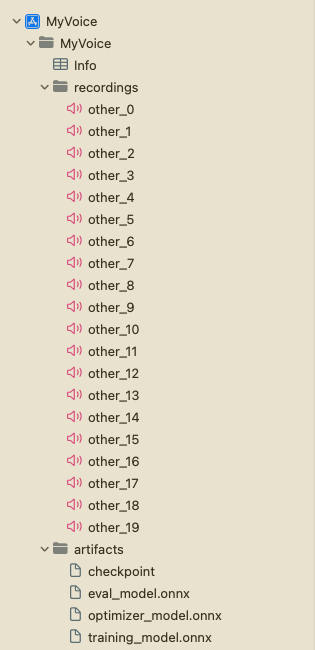
現在,在專案導航器中右鍵點選“MyVoice”組,然後點選“New Group”以在專案中建立一個名為 artifacts 的新組。將上一節中生成的工件拖放到 artifacts 組中。確保選擇 Create folder references 和 Copy items if needed 選項。這將把工件新增到專案中。
接下來,右鍵點選“MyVoice”組,然後點選“New Group”以在專案中建立一個名為 recordings 的新組。此組將包含用於訓練的音訊錄音。您可以透過執行專案根目錄下的 recording_gen.py 指令碼來生成錄音。另外,您也可以使用除您計劃用於訓練的說話人的聲音之外的任何其他說話人的錄音。請確保錄音是單聲道,長度為 10 秒,採用 .wav 格式,取樣率為 16KHz。此外,請確保將錄音命名為 other_0.wav、other_1.wav 等,並將它們新增到 recordings 組中。
專案結構應如下所示:
應用程式概覽
該應用程式將包含兩個主要的 UI 檢視:TrainView 和 InferView。TrainView 用於在裝置上訓練模型,而 InferView 用於使用訓練好的模型執行推理。此外,還有一個 ContentView,它是應用程式的主檢視,包含導航到 TrainView 和 InferView 的按鈕。
此外,我們還將建立一個 AudioRecorder 類來處理透過麥克風進行音訊錄製。它將錄製 10 秒的音訊,並將音訊資料作為 Data 物件輸出,可用於訓練和推理目的。
我們將有一個 Trainer 類,它將處理模型的訓練和匯出。
最後,我們還將建立一個 VoiceIdentifier 類,該類將處理使用訓練好的模型進行推理。
訓練模型
首先,我們將建立一個 Trainer 類,它將處理模型的訓練和匯出。它將載入訓練工件,在給定音訊上訓練模型,並使用 ONNX Runtime 裝置端訓練 API 匯出訓練好的模型。API 的詳細文件可以在這裡找到。
Trainer 類將具有以下公共方法:
init()- 初始化訓練會話並載入訓練工件。train(_ trainingData: [Data])- 在給定使用者音訊資料上訓練模型。它將接收一個Data物件陣列,其中每個Data物件代表使用者的音訊資料,並將其與一些預錄製的音訊資料一起用於訓練模型。exportModelForInference()- 匯出訓練好的模型以用於推理。
-
載入訓練工件並初始化訓練會話
要訓練模型,我們首先需要載入工件,建立
ORTEnv、ORTTrainingSession和ORTCheckpoint。這些物件將用於訓練模型。我們將在Trainer類的init方法中建立這些物件。import Foundation import onnxruntime_training_objc class Trainer { private let ortEnv: ORTEnv private let trainingSession: ORTTrainingSession private let checkpoint: ORTCheckpoint enum TrainerError: Error { case Error(_ message: String) } init() throws { ortEnv = try ORTEnv(loggingLevel: ORTLoggingLevel.warning) // get path for artifacts guard let trainingModelPath = Bundle.main.path(forResource: "training_model", ofType: "onnx") else { throw TrainerError.Error("Failed to find training model file.") } guard let evalModelPath = Bundle.main.path(forResource: "eval_model",ofType: "onnx") else { throw TrainerError.Error("Failed to find eval model file.") } guard let optimizerPath = Bundle.main.path(forResource: "optimizer_model", ofType: "onnx") else { throw TrainerError.Error("Failed to find optimizer model file.") } guard let checkpointPath = Bundle.main.path(forResource: "checkpoint", ofType: nil) else { throw TrainerError.Error("Failed to find checkpoint file.") } checkpoint = try ORTCheckpoint(path: checkpointPath) trainingSession = try ORTTrainingSession(env: ortEnv, sessionOptions: ORTSessionOptions(), checkpoint: checkpoint, trainModelPath: trainingModelPath, evalModelPath: evalModelPath, optimizerModelPath: optimizerPath) } } -
訓練模型
a. 在訓練模型之前,我們首先需要從我們前面建立的 wav 檔案中提取資料。下面是用於從 wav 檔案中提取資料的簡單函式。
private func getDataFromWavFile(fileName: String) throws -> (AVAudioBuffer, Data) {
    guard let fileUrl = Bundle.main.url(forResource: fileName, withExtension:"wav") else {
        throw TrainerError.Error("Failed to find wav file: \(fileName).")
    }

    let audioFile = try AVAudioFile(forReading: fileUrl)
    let format = audioFile.processingFormat
    let totalFrames = AVAudioFrameCount(audioFile.length)

    guard let buffer = AVAudioPCMBuffer(pcmFormat: format, frameCapacity: totalFrames) else {
        throw TrainerError.Error("Failed to create audio buffer.")
    }

    try audioFile.read(into: buffer)

    guard let floatChannelData = buffer.floatChannelData else {
        throw TrainerError.Error("Failed to get float channel data.")
    }

    let data = Data(
        bytesNoCopy: floatChannelData[0],
        count: Int(buffer.frameLength) * MemoryLayout<Float>.size,
        deallocator: .none
    )
    return (buffer, data)
}
b.
TrainingSession.trainStep函式負責訓練模型。它接收輸入資料和標籤,並返回損失。輸入作為ORTValue物件傳遞給 ONNX Runtime。因此,我們需要將輸入音訊Data物件和標籤轉換為ORTValue。private func getORTValue(dataList: [Data]) throws -> ORTValue { let tensorData = NSMutableData() dataList.forEach {data in tensorData.append(data)} let inputShape: [NSNumber] = [dataList.count as NSNumber, dataList[0].count / MemoryLayout<Float>.stride as NSNumber] return try ORTValue( tensorData: tensorData, elementType: ORTTensorElementDataType.float, shape: inputShape ) } private func getORTValue(labels: [Int64]) throws -> ORTValue { let tensorData = NSMutableData(bytes: labels, length: labels.count * MemoryLayout<Int64>.stride) let inputShape: [NSNumber] = [labels.count as NSNumber] return try ORTValue ( tensorData: tensorData, elementType: ORTTensorElementDataType.int64, shape: inputShape ) }c. 我們已準備好編寫
trainStep函式,該函式接收一批輸入資料和標籤,並對給定批次執行一步訓練。func trainStep(inputData: [Data], labels: [Int64]) throws { let inputs = [try getORTValue(dataList: inputData), try getORTValue(labels: labels)] try trainingSession.trainStep(withInputValues: inputs) // update the model params try trainingSession.optimizerStep() // reset the gradients try trainingSession.lazyResetGrad() }d. 最後,我們擁有編寫訓練迴圈所需的一切。
kNumOtherRecordings表示我們之前建立的recordings目錄中有多少個錄音。kNumEpochs表示我們希望在給定資料上訓練模型的 epoch 數量。kUserIndex和kOtherIndex分別表示使用者和其他錄音的標籤。我們還有一個
progressCallback,它將在每個訓練步驟後被呼叫。我們將使用此回撥來更新 UI 中的進度條。private let kNumOtherRecordings: Int = 20 private let kNumEpochs: Int = 3 let kUserIndex: Int64 = 1 let kOtherIndex: Int64 = 0 func train(_ trainingData: [Data], progressCallback: @escaping (Double) -> Void) throws { let numRecordings = trainingData.count var otherRecordings = Array(0..<kNumOtherRecordings) for e in 0..<kNumEpochs { print("Epoch: \(e)") otherRecordings.shuffle() let otherData = otherRecordings.prefix(numRecordings) for i in 0..<numRecordings { let (buffer, wavFileData) = try getDataFromWavFile(fileName: "other_\(otherData[i])") try trainStep(inputData: [trainingData[i], wavFileData], labels: [kUserIndex, kOtherIndex]) print("finished training on recording \(i)") let progress = Double((e * numRecordings) + i + 1) / Double(kNumEpochs * numRecordings) progressCallback(progress) } } } -
匯出訓練好的模型
我們可以使用
ORTTrainingSession類的exportModelForInference方法來匯出訓練好的模型。該方法接收模型應匯出的路徑和模型的輸出名稱。這裡,我們將模型匯出到應用程式的
Library目錄。匯出的模型將用於推理目的。func exportModelForInference() throws { guard let libraryDirectory = FileManager.default.urls(for: .libraryDirectory, in: .userDomainMask).first else { throw TrainerError.Error("Failed to find library directory ") } let modelPath = libraryDirectory.appendingPathComponent("inference_model.onnx").path try trainingSession.exportModelForInference(withOutputPath: modelPath, graphOutputNames: ["output"]) }
Trainer 類的完整實現可以在這裡找到。
使用訓練好的模型進行推理
VoiceIdentifier 類將處理使用訓練好的模型進行推理。它將載入訓練好的模型並在給定音訊資料上執行推理。該類將包含 evaluate(inputData: Data) -> Result<(Bool, Float), Error> 方法,該方法將接收音訊資料並返回推理結果。結果將是一個 (Bool, Float) 元組,其中第一個元素表示音訊是否被識別為使用者,第二個元素表示預測的置信度分數。
首先,我們使用 ORTSession 物件載入訓練好的模型。
class VoiceIdentifier {

    private let ortEnv : ORTEnv
    private let ortSession: ORTSession
    private let kThresholdProbability: Float = 0.80

    enum VoiceIdentifierError: Error {
        case Error(_ message: String)
    }

    init() throws {
        ortEnv = try ORTEnv(loggingLevel: ORTLoggingLevel.warning)

        guard let libraryDirectory = FileManager.default.urls(for: .libraryDirectory, in: .userDomainMask).first else {
            throw VoiceIdentifierError.Error("Failed to find library directory ")
        }
        let modelPath = libraryDirectory.appendingPathComponent("inference_model.onnx").path

        if !FileManager.default.fileExists(atPath: modelPath) {
            throw VoiceIdentifierError.Error("Failed to find inference model file.")
        }
        ortSession = try ORTSession(env: ortEnv, modelPath: modelPath, sessionOptions: nil)
    }
}
接下來,我們將編寫 evaluate 方法。首先,它將接收音訊資料並將其轉換為 ORTValue。然後,它將使用模型執行推理。最後,它將從輸出中提取 logits 並應用 softmax 以獲得機率。
    private func isUser(logits: [Float]) -> Float {
        // apply softMax
        let maxInput = logits.max() ?? 0.0
        let expValues = logits.map { exp($0 - maxInput) } // Calculate e^(x - maxInput) for each element
        let expSum = expValues.reduce(0, +) // Sum of all e^(x - maxInput) values

        return expValues.map { $0 / expSum }[1] // Calculate the softmax probabilities
    }

    func evaluate(inputData: Data) -> Result<(Bool, Float), Error> {

        return Result<(Bool, Float), Error> { () -> (Bool, Float) in

            // convert input data to ORTValue
            let inputShape: [NSNumber] = [1, inputData.count / MemoryLayout<Float>.stride as NSNumber]

            let input = try ORTValue(
                tensorData: NSMutableData(data: inputData),
                elementType: ORTTensorElementDataType.float,
                shape: inputShape)

            let outputs = try ortSession.run(
                withInputs: ["input": input],
                outputNames: ["output"],
                runOptions: nil)

            guard let output = outputs["output"] else {
                throw VoiceIdentifierError.Error("Failed to get model output from inference.")
            }

            let outputData = try output.tensorData() as Data
            let probUser = outputData.withUnsafeBytes { (buffer: UnsafeRawBufferPointer) -> Float in
                let floatBuffer = buffer.bindMemory(to: Float.self)
                let logits = Array(UnsafeBufferPointer(start: floatBuffer.baseAddress, count: outputData.count/MemoryLayout<Float>.stride))
                return isUser(logits: logits)
            }

            return (probUser >= kThresholdProbability, probUser)
        }
    }
VoiceIdentifier 類的完整實現可以在這裡找到。
錄製音訊
我們將使用 AudioRecorder 類透過麥克風錄製音訊。它將錄製 10 秒的音訊,並將音訊資料作為 Data 物件輸出,可用於訓練和推理目的。我們將使用 AVFoundation 框架訪問麥克風並錄製音訊。將有一個公共方法 record(callback: @escaping RecordingDoneCallback),它將錄製音訊並在錄製完成後呼叫回撥函式並返回音訊資料。
import AVFoundation
import Foundation

private let kSampleRate: Int = 16000
private let kRecordingDuration: TimeInterval = 10

class AudioRecorder {
    typealias RecordResult = Result<Data, Error>
    typealias RecordingDoneCallback = (RecordResult) -> Void

    enum AudioRecorderError: Error {
        case Error(message: String)
    }

    func record(callback: @escaping RecordingDoneCallback) {
        let session = AVAudioSession.sharedInstance()
        session.requestRecordPermission { allowed in
            do {
                guard allowed else {
                    throw AudioRecorderError.Error(message: "Recording permission denied.")
                }

                try session.setCategory(.record)
                try session.setActive(true)

                let tempDir = FileManager.default.temporaryDirectory

                let recordingUrl = tempDir.appendingPathComponent("recording.wav")

                let formatSettings: [String: Any] = [
                    AVFormatIDKey: kAudioFormatLinearPCM,
                    AVSampleRateKey: kSampleRate,
                    AVNumberOfChannelsKey: 1,
                    AVLinearPCMBitDepthKey: 16,
                    AVLinearPCMIsBigEndianKey: false,
                    AVLinearPCMIsFloatKey: false,
                    AVEncoderAudioQualityKey: AVAudioQuality.high.rawValue,
                ]

                let recorder = try AVAudioRecorder(url: recordingUrl, settings: formatSettings)
                self.recorder = recorder

                let delegate = RecorderDelegate(callback: callback)
                recorder.delegate = delegate
                self.recorderDelegate = delegate

                guard recorder.record(forDuration: kRecordingDuration) else {
                    throw AudioRecorderError.Error(message: "Failed to record.")
                }

                // control should resume in recorder.delegate.audioRecorderDidFinishRecording()
            } catch {
                callback(.failure(error))
            }
        }
    }

    private var recorderDelegate: RecorderDelegate?
    private var recorder: AVAudioRecorder?

    private class RecorderDelegate: NSObject, AVAudioRecorderDelegate {
        private let callback: RecordingDoneCallback

        init(callback: @escaping RecordingDoneCallback) {
            self.callback = callback
        }

        func audioRecorderDidFinishRecording(
            _ recorder: AVAudioRecorder,
            successfully flag: Bool
        ) {
            let recordResult = RecordResult { () -> Data in
                guard flag else {
                    throw AudioRecorderError.Error(message: "Recording was unsuccessful.")
                }

                let recordingUrl = recorder.url
                let recordingFile = try AVAudioFile(forReading: recordingUrl)

                guard
                    let format = AVAudioFormat(
                        commonFormat: .pcmFormatFloat32,
                        sampleRate: recordingFile.fileFormat.sampleRate,
                        channels: 1,
                        interleaved: false)
                else {
                    throw AudioRecorderError.Error(message: "Failed to create audio format.")
                }

                guard
                    let recordingBuffer = AVAudioPCMBuffer(
                        pcmFormat: format,
                        frameCapacity: AVAudioFrameCount(recordingFile.length))
                else {
                    throw AudioRecorderError.Error(message: "Failed to create audio buffer.")
                }

                try recordingFile.read(into: recordingBuffer)

                guard let recordingFloatChannelData = recordingBuffer.floatChannelData else {
                    throw AudioRecorderError.Error(message: "Failed to get float channel data.")
                }

                return Data(bytes: recordingFloatChannelData[0], count: Int(recordingBuffer.frameLength) * MemoryLayout<Float>.size)

            }

            callback(recordResult)
        }

        func audioRecorderEncodeErrorDidOccur(
            _ recorder: AVAudioRecorder,
            error: Error?
        ) {
            if let error = error {
                callback(.failure(error))
            } else {
                callback(.failure(AudioRecorderError.Error(message: "Encoding was unsuccessful.")))
            }
        }
    }
}
訓練檢視
TrainView 將用於在使用者語音上訓練模型。首先,它會提示使用者錄製 kNumRecordings 次他們的語音。然後,它將在使用者語音和一些預錄製的其他說話人語音上訓練模型。最後,它將匯出訓練好的模型以用於推理。
import SwiftUI

struct TrainView: View {

    enum ViewState {
        case recordingTrainingData, trainingInProgress, trainingComplete
    }

    private static let sentences = [
        "In the embrace of nature's beauty, I find peace and tranquility. The gentle rustling of leaves soothes my soul, and the soft sunlight kisses my skin. As I breathe in the fresh air, I am reminded of the interconnectedness of all living things, and I feel a sense of oneness with the world around me.",
        "Under the starlit sky, I gaze in wonder at the vastness of the universe. Each twinkle represents a story yet untold, a dream yet to be realized. With every new dawn, I am filled with hope and excitement for the opportunities that lie ahead. I embrace each day as a chance to grow, to learn, and to create beautiful memories.",
        "A warm hug from a loved one is a precious gift that warms my heart. In that tender embrace, I feel a sense of belonging and security. Laughter and tears shared with dear friends create a bond that withstands the test of time. These connections enrich my life and remind me of the power of human relationships.",
        "Life's journey is like a beautiful melody, with each note representing a unique experience. As I take each step, I harmonize with the rhythm of existence. Challenges may come my way, but I face them with resilience and determination, knowing they are opportunities for growth and self-discovery.",
        "With every page turned in a book, I open the door to new worlds and ideas. The written words carry the wisdom of countless souls, and I am humbled by the knowledge they offer. In stories, I find a mirror to my own experiences and a beacon of hope for a better tomorrow.",
        "Life's trials may bend me, but they will not break me. Through adversity, I discover the strength within my heart. Each obstacle is a chance to learn, to evolve, and to emerge as a better version of myself. I am grateful for every lesson, for they shape me into the person I am meant to be.",
        "The sky above is an ever-changing canvas of colors and clouds. In its vastness, I realize how small I am in the grand scheme of things, and yet, I know my actions can ripple through the universe. As I walk this Earth, I seek to leave behind a positive impact and a legacy of love and compassion.",
        "In the stillness of meditation, I connect with the depth of my soul. The external noise fades away, and I hear the whispers of my inner wisdom. With each breath, I release tension and embrace serenity. Meditation is my sanctuary, a place where I can find clarity and renewed energy.",
        "Kindness is a chain reaction that spreads like wildfire. A simple act of compassion can brighten someone's day and inspire them to pay it forward. Together, we can create a wave of goodness that knows no boundaries, reaching even the farthest corners of the world.",
        "As the sun rises on a new day, I am filled with gratitude for the gift of life. Every moment is a chance to make a difference, to love deeply, and to embrace joy. I welcome the adventures that await me and eagerly embrace the mysteries yet to be uncovered."
    ]


    private let kNumRecordings = 5
    private let audioRecorder = AudioRecorder()
    private let trainer = try! Trainer()

    @State private var trainingData: [Data] = []

    @State private var viewState: ViewState = .recordingTrainingData
    @State private var readyToRecord: Bool = true
    @State private var trainingProgress: Double = 0.0

    private func recordVoice() {
        audioRecorder.record { recordResult in
           switch recordResult {
           case .success(let recordingData):
               trainingData.append(recordingData)
               print("Successfully completed Recording")
           case .failure(let error):
               print("Error: \(error)")
            }

            readyToRecord = true

            if trainingData.count == kNumRecordings  {
                viewState = .trainingInProgress
                trainAndExportModel()
            }
        }
    }

    private func updateProgressBar(progress: Double) {
        DispatchQueue.main.async {
            trainingProgress = progress
        }
    }

    private func trainAndExportModel() {
        Task {
            do {
                try trainer.train(trainingData, progressCallback: updateProgressBar)
                try trainer.exportModelForInference()

                DispatchQueue.main.async {
                    viewState = .trainingComplete
                    print("Training is complete")
                }
            } catch {
                DispatchQueue.main.async {
                    viewState = .trainingComplete
                    print("Training Failed: \(error)")
                }
            }
        }
    }


    var body: some View {
        VStack {

            switch viewState {
            case .recordingTrainingData:
                Text("\(trainingData.count + 1) of \(kNumRecordings)")
                    .font(.caption)
                    .foregroundColor(.secondary)
                    .padding()

                ProgressView(value: Double(trainingData.count),
                             total: Double(kNumRecordings))
                .progressViewStyle(LinearProgressViewStyle(tint: .purple))
                .frame(height: 10)
                .cornerRadius(5)

                Spacer()

                Text(TrainView.sentences[trainingData.count % TrainView.sentences.count])
                    .font(.body)
                    .padding()
                    .multilineTextAlignment(.center)
                    .fontDesign(.monospaced)

                Spacer()

                ZStack(alignment: .center) {
                    Image(systemName: "mic.fill")
                        .resizable()
                        .aspectRatio(contentMode: .fit)
                        .frame(width: 100, height: 100)
                        .foregroundColor( readyToRecord ? .gray: .red)
                        .transition(.scale)
                        .animation(.easeIn, value: 1)
                }

                Spacer()

                Button(action: {
                    readyToRecord = false
                    recordVoice()
                }) {
                    Text(readyToRecord ? "Record" : "Recording ...")
                        .font(.title)
                        .padding()
                        .background(readyToRecord ? .green : .gray)
                        .foregroundColor(.white)
                        .cornerRadius(10)
                }.disabled(!readyToRecord)

            case .trainingInProgress:
                VStack {
                    Spacer()
                    ProgressView(value: trainingProgress,
                                 total: 1.0,
                                 label: {Text("Training")},
                                 currentValueLabel: {Text(String(format: "%.0f%%", trainingProgress * 100))})
                    .padding()
                    Spacer()
                }

            case .trainingComplete:
                Spacer()
                Text("Training successfully finished!")
                    .font(.title)
                    .padding()
                    .multilineTextAlignment(.center)
                    .fontDesign(.monospaced)

                Spacer()
                NavigationLink(destination: InferView()) {
                    Text("Infer")
                        .font(.title)
                        .padding()
                        .background(.purple)
                        .foregroundColor(.white)
                        .cornerRadius(10)
                }
                .padding(.leading, 20)
            }

            Spacer()
        }
        .padding()
        .navigationTitle("Train")
    }
}

struct TrainView_Previews: PreviewProvider {
    static var previews: some View {
        TrainView()
    }
}
TrainView 的完整實現可以在這裡找到。
推理檢視
最後,我們將建立 InferView,它將用於使用訓練好的模型執行推理。它將提示使用者錄製他們的聲音,並使用訓練好的模型進行推理。然後,它將顯示推理結果。
import SwiftUI

struct InferView: View {

    enum InferResult {
        case user, other, notSet
    }

    private let audioRecorder = AudioRecorder()

    @State private var voiceIdentifier: VoiceIdentifier? = nil
    @State private var readyToRecord: Bool = true

    @State private var inferResult: InferResult = InferResult.notSet
    @State private var probUser: Float = 0.0

    @State private var showAlert = false
    @State private var alertMessage = ""

    private func recordVoice() {
        audioRecorder.record { recordResult in
            let recognizeResult = recordResult.flatMap { recordingData in
                return voiceIdentifier!.evaluate(inputData: recordingData)
            }
            endRecord(recognizeResult)
        }
    }

    private func endRecord(_ result: Result<(Bool, Float), Error>) {
        DispatchQueue.main.async {
            switch result {
            case .success(let (isMatch, confidence)):
                print("Your Voice with confidence: \(isMatch),  \(confidence)")
                inferResult = isMatch ? .user : .other
                probUser = confidence
            case .failure(let error):
                print("Error: \(error)")
            }
            readyToRecord = true
        }
    }

    var body: some View {
        VStack {
            Spacer()

            ZStack(alignment: .center) {
                Image(systemName: "mic.fill")
                    .resizable()
                    .aspectRatio(contentMode: .fit)
                    .frame(width: 100, height: 100)
                    .foregroundColor( readyToRecord ? .gray: .red)
                    .transition(.scale)
                    .animation(.easeInOut, value: 1)
            }

            Spacer()

            Button(action: {
                readyToRecord = false
                recordVoice()
            }) {
                Text(readyToRecord ? "Record" : "Recording ...")
                    .font(.title)
                    .padding()
                    .background(readyToRecord ? .green : .gray)
                    .foregroundColor(.white)
                    .cornerRadius(10)

            }.disabled(voiceIdentifier == nil || !readyToRecord)
                .opacity(voiceIdentifier == nil ? 0.5: 1.0)

            if  inferResult != .notSet {
                Spacer()
                ZStack (alignment: .center) {
                    Image(systemName: inferResult == .user ? "person.crop.circle.fill.badge.checkmark": "person.crop.circle.fill.badge.xmark")
                        .resizable()
                        .aspectRatio(contentMode: .fit)
                        .frame(width: 100, height: 100)
                        .foregroundColor(inferResult == .user ? .green : .red)
                        .animation(.easeInOut, value: 2)

                }

                Text("Probability of User : \(String(format: "%.2f", probUser*100.0))%")
                    .multilineTextAlignment(.center)
                    .fontDesign(.monospaced)
            }

            Spacer()
        }
        .padding()
        .navigationTitle("Infer")
        .onAppear {
            do {
                voiceIdentifier = try  VoiceIdentifier()

            } catch {
                alertMessage = "Error initializing inference session, make sure that training is completed: \(error)"
                showAlert = true
            }

        }
        .alert(isPresented: $showAlert) {
            Alert(title: Text("Error"), message: Text(alertMessage), dismissButton: .default(Text("OK")))
        }
    }
}

struct InferView_Previews: PreviewProvider {
    static var previews: some View {
        InferView()
    }
}
InferView 的完整實現可以在這裡找到。
ContentView
最後,我們將更新預設的 ContentView,使其包含導航到 TrainView 和 InferView 的按鈕。
import SwiftUI

struct ContentView: View {
    var body: some View {
        NavigationView {
            VStack {

                Text("My Voice")
                    .font(.largeTitle)
                    .padding(.top, 50)

                Spacer()

                ZStack(alignment: .center) {
                    Image(systemName: "waveform.circle.fill")
                        .resizable()
                        .aspectRatio(contentMode: .fit)
                        .frame(width: 100, height: 100)
                        .foregroundColor(.purple)
                }

                Spacer()

                HStack {
                    NavigationLink(destination: TrainView()) {
                        Text("Train")
                            .font(.title)
                            .padding()
                            .background(Color.purple)
                            .foregroundColor(.white)
                            .cornerRadius(10)
                    }
                    .padding(.trailing, 20)

                    NavigationLink(destination: InferView()) {
                        Text("Infer")
                            .font(.title)
                            .padding()
                            .background(.purple)
                            .foregroundColor(.white)
                            .cornerRadius(10)
                    }
                    .padding(.leading, 20)
                }

                Spacer()
            }
            .padding()
        }
    }
}

struct ContentView_Previews: PreviewProvider {
    static var previews: some View {
        ContentView()
    }
}
ContentView 的完整實現可以在這裡找到。
執行 iOS 應用程式
現在,我們準備執行該應用程式。您可以在模擬器或裝置上執行該應用程式。您可以在此處找到有關在模擬器和裝置上執行應用程式的更多資訊。
a. 現在,當您執行應用程式時,您應該看到以下螢幕:
b. 接下來,點選 Train 按鈕導航到 TrainView。TrainView 將提示您錄製您的聲音。您需要錄製您的聲音 kNumRecordings 次。
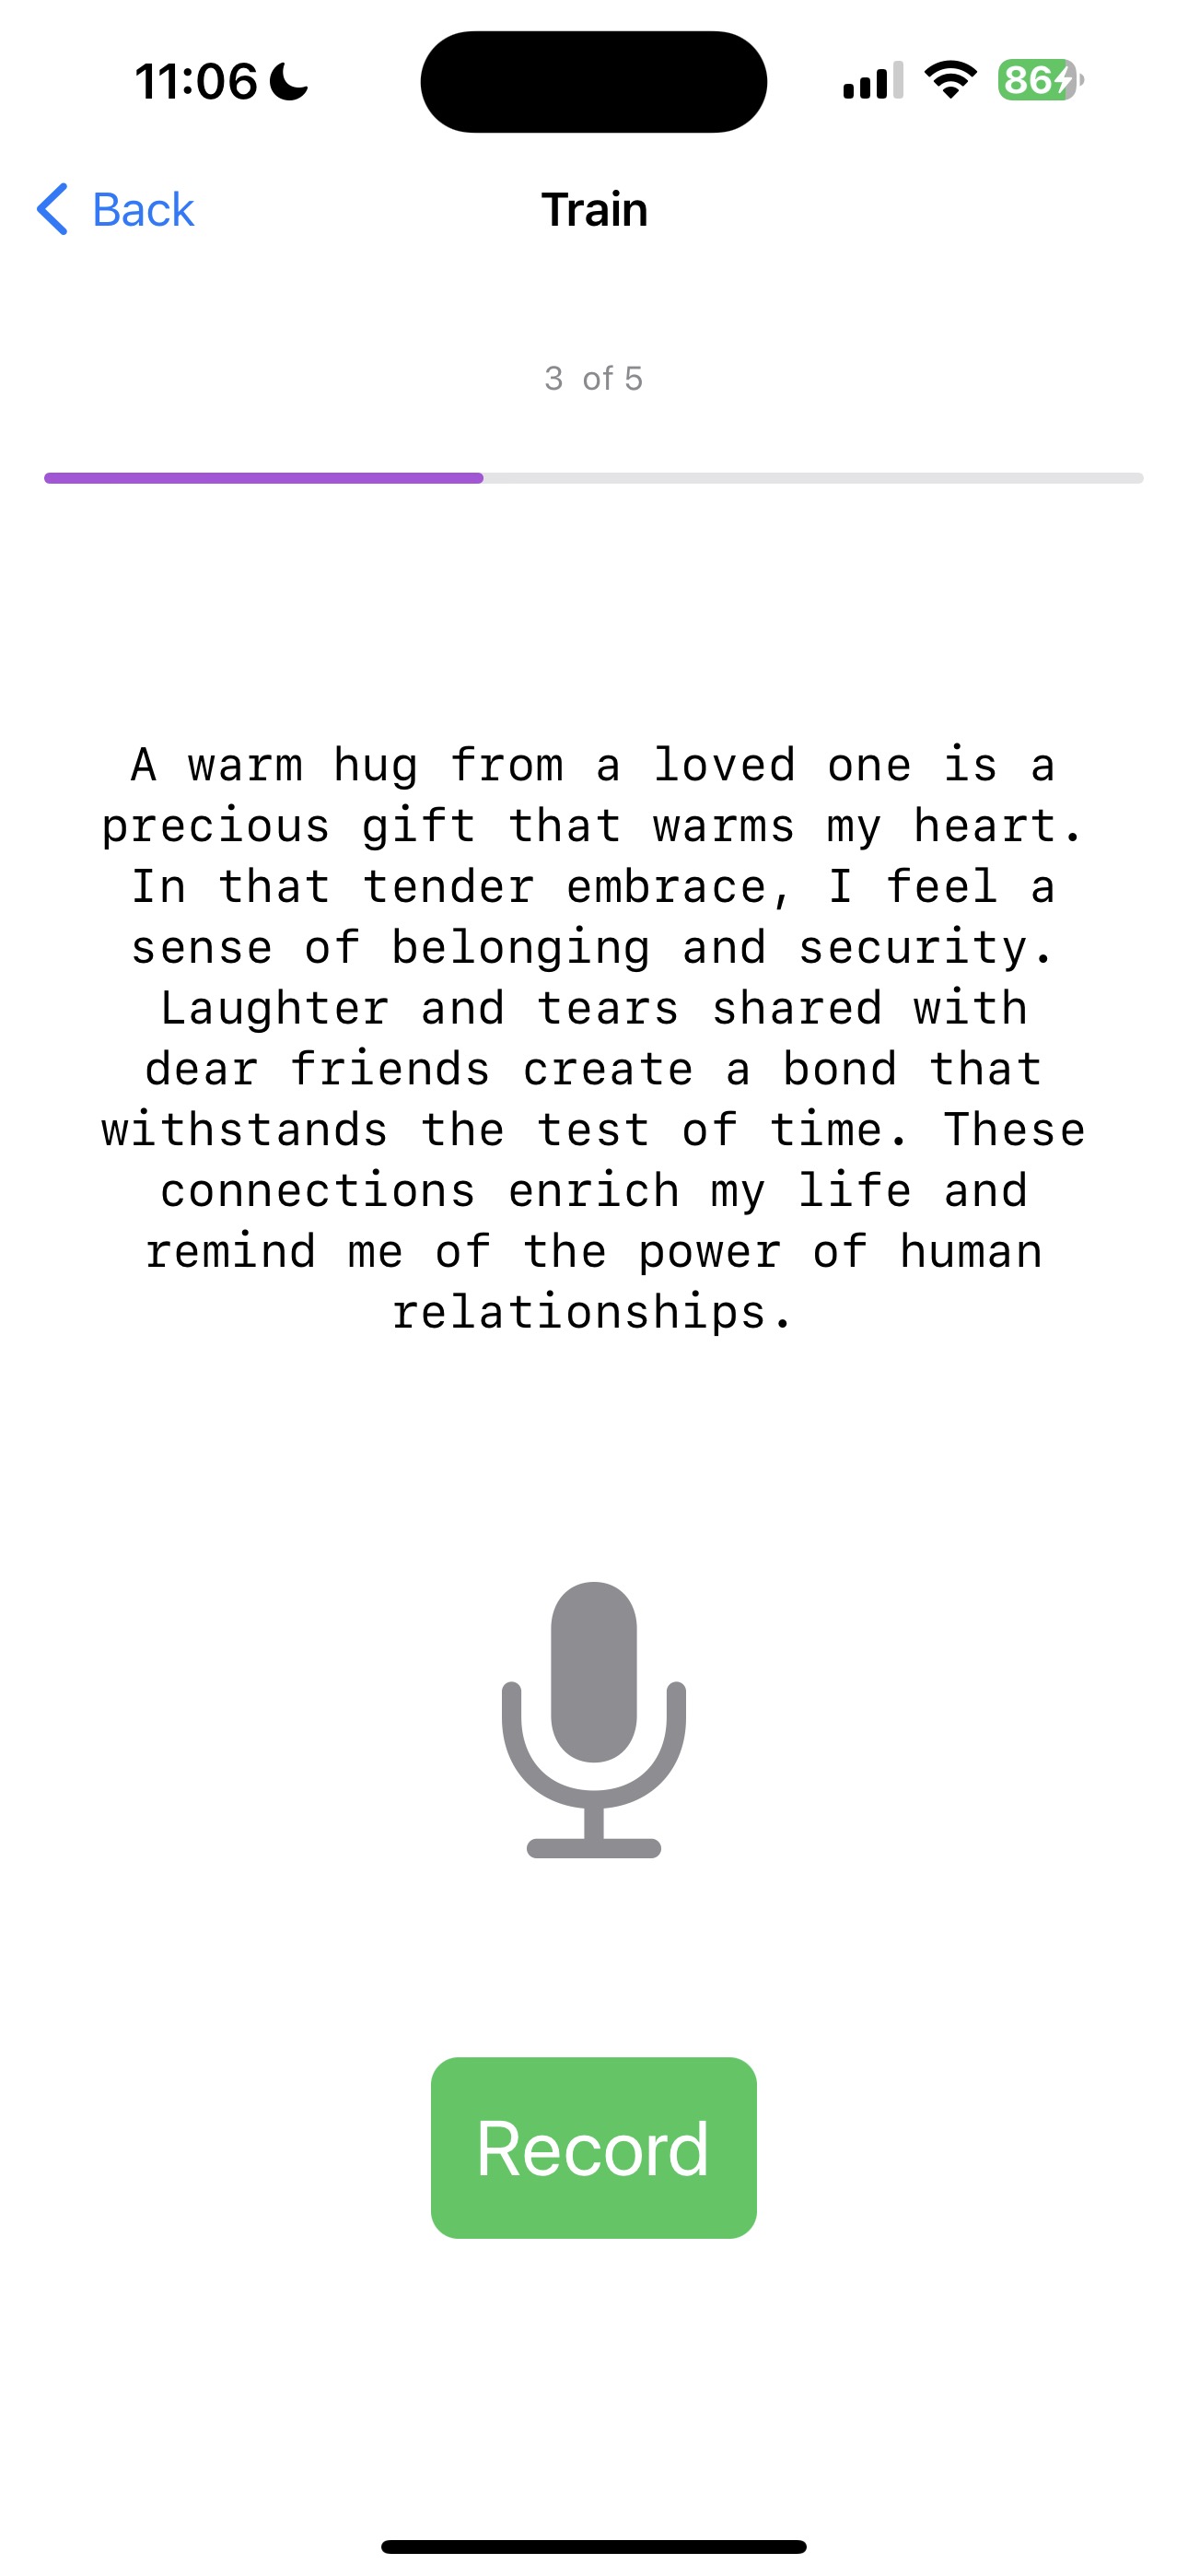
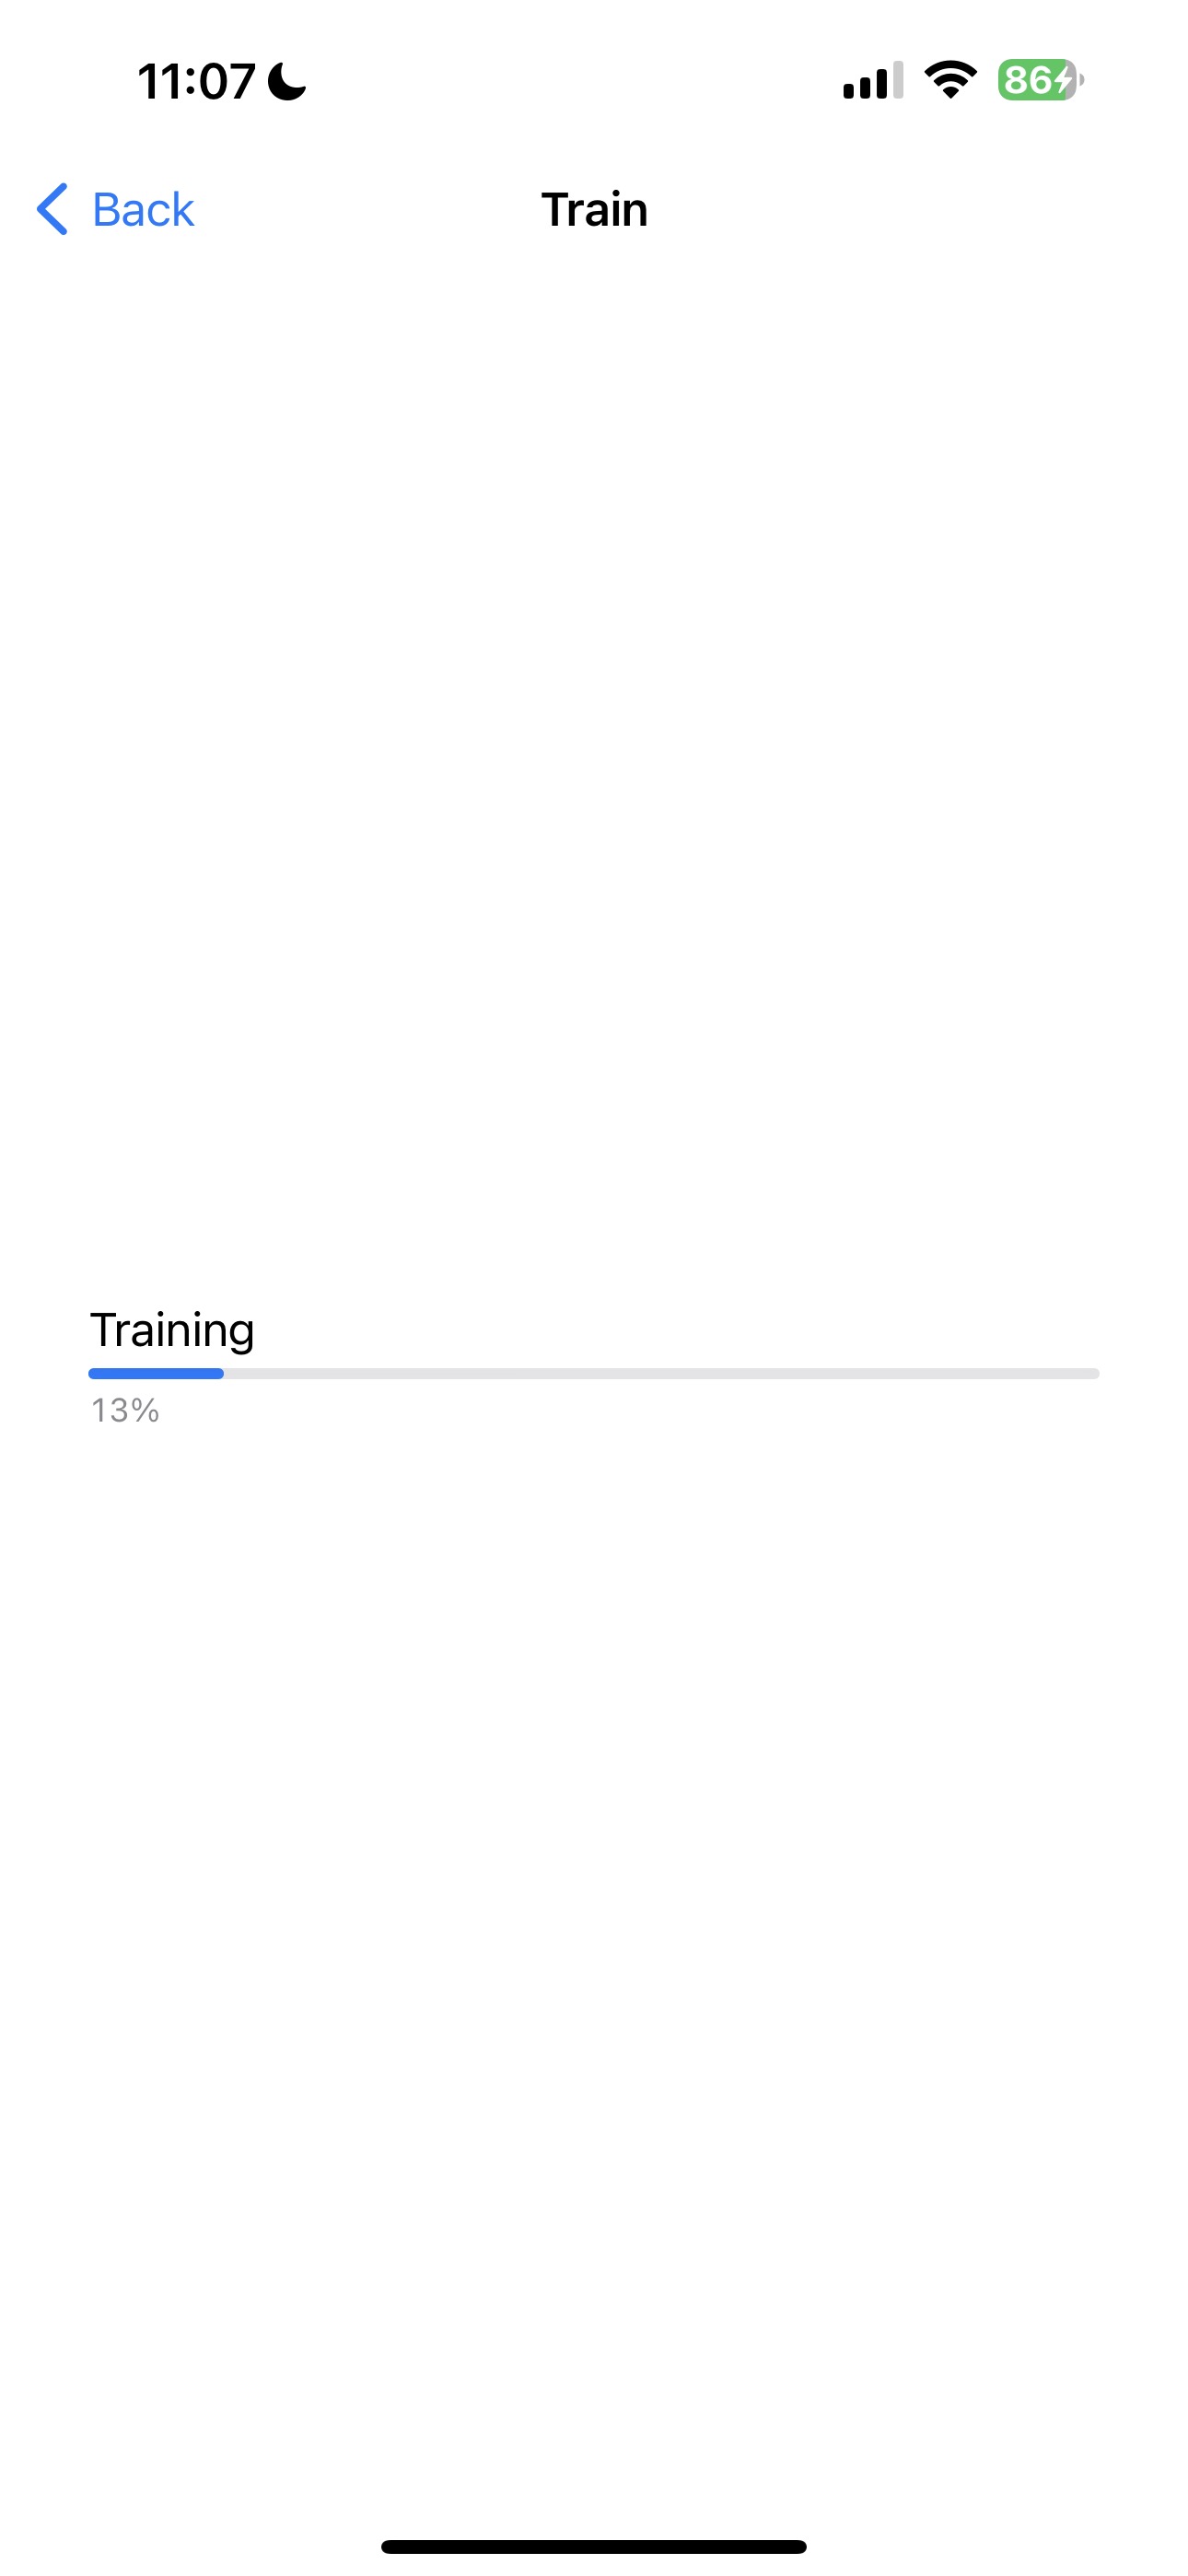
c. 所有錄音完成後,應用程式將根據給定資料訓練模型。您將看到進度條指示訓練進度。
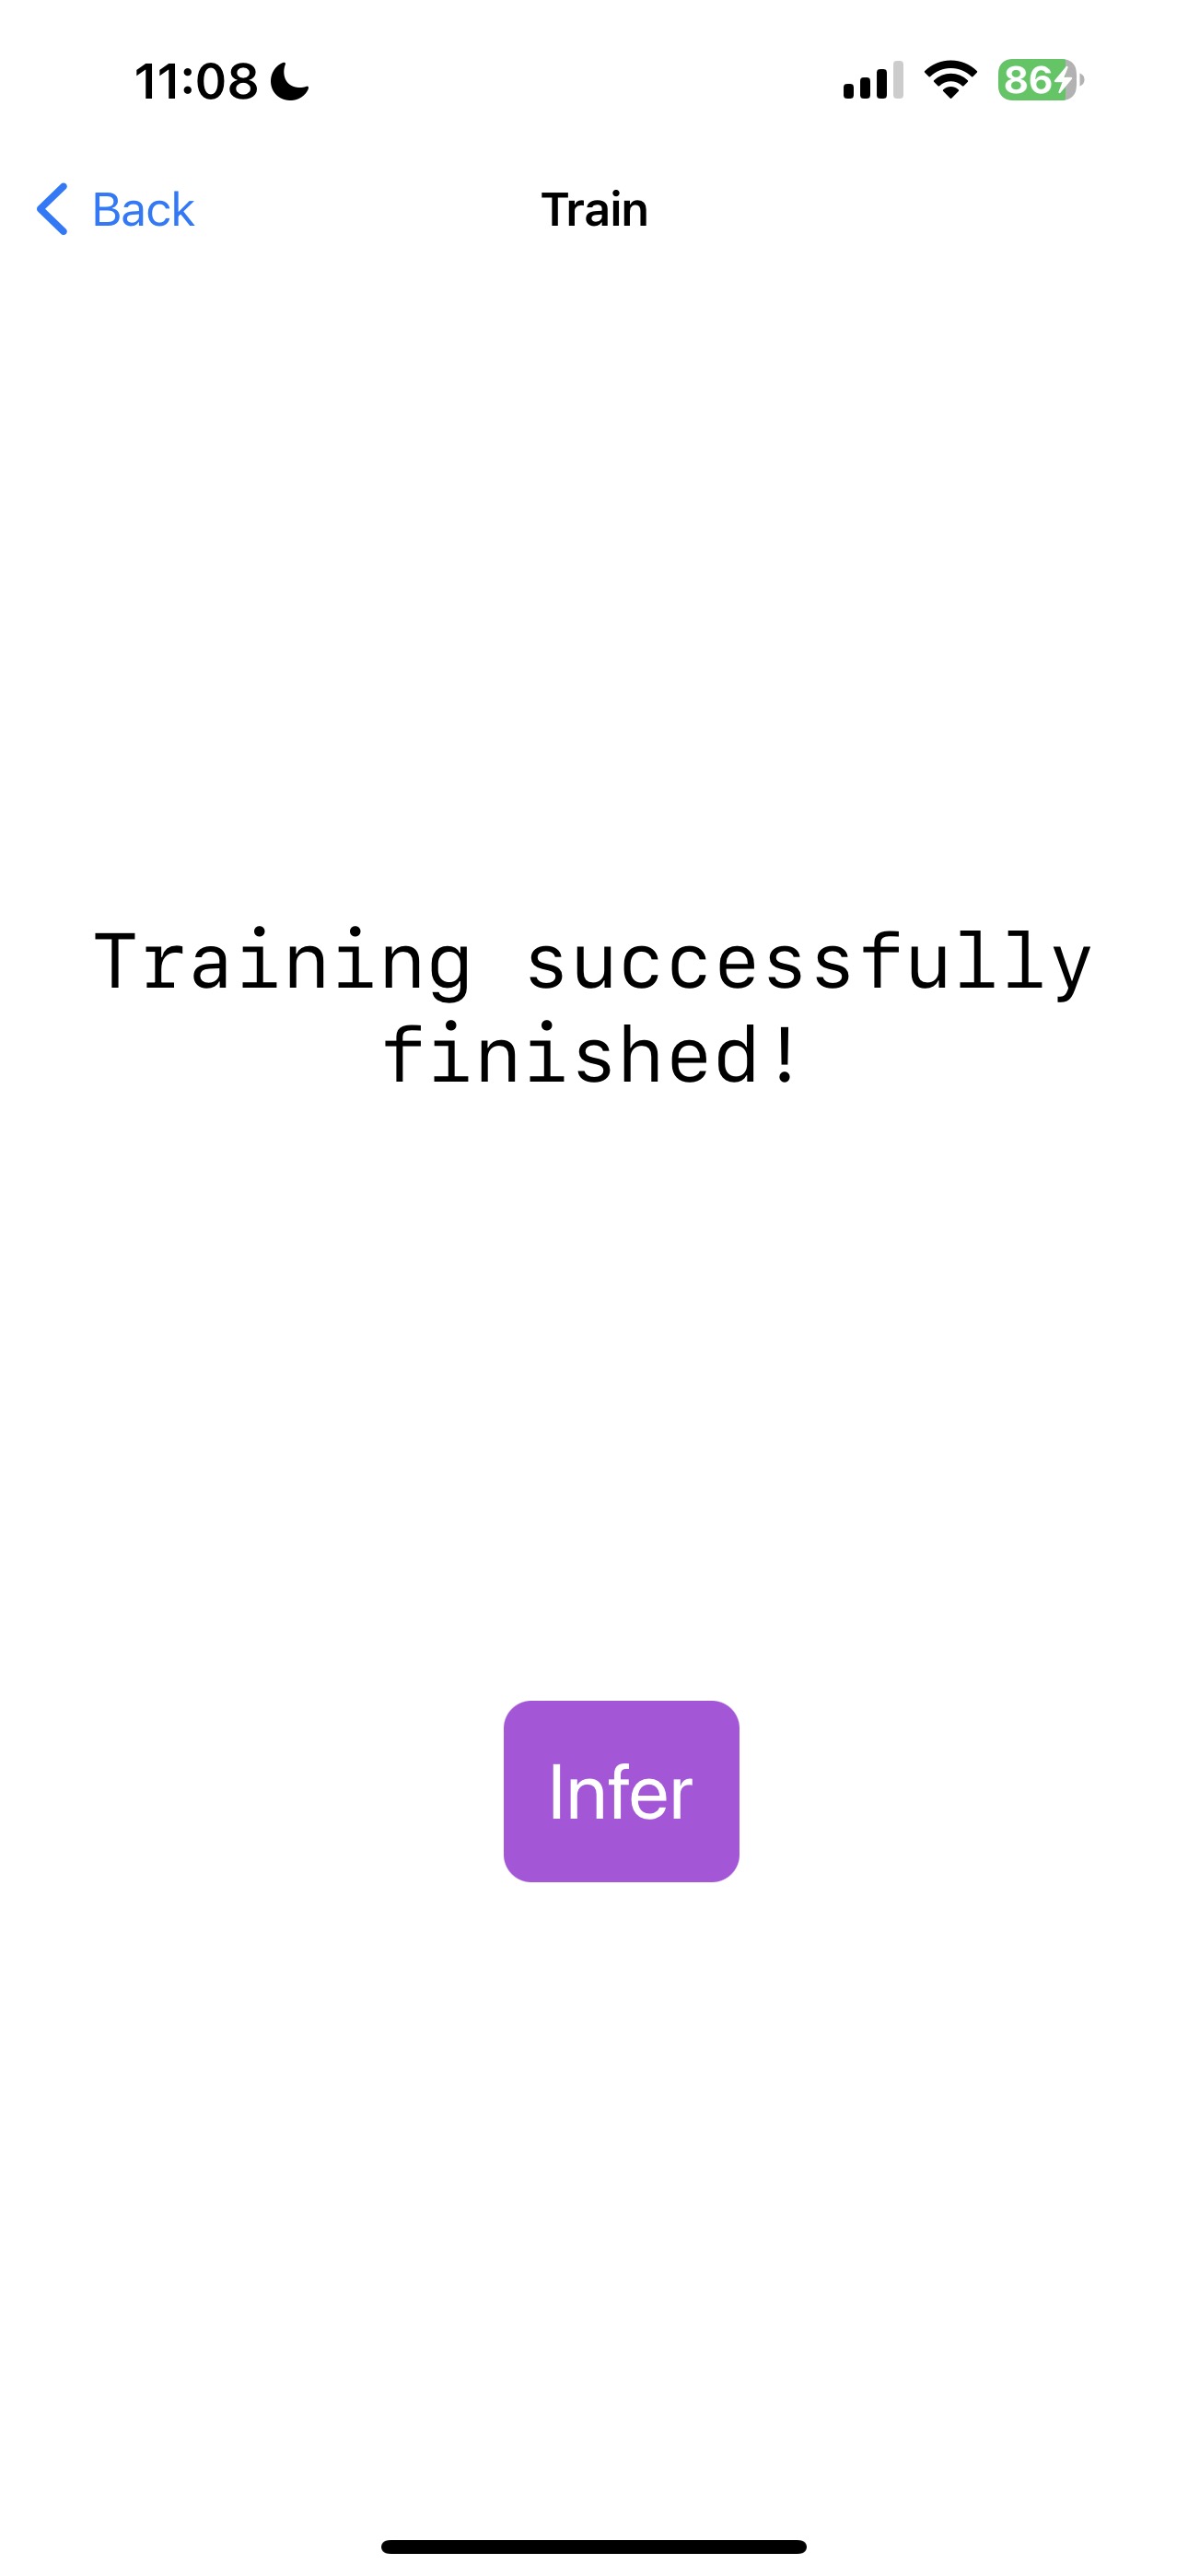
d. 訓練完成後,您將看到以下螢幕:
e. 現在,點選 Infer 按鈕導航到 InferView。InferView 將提示您錄製您的聲音。錄音完成後,它將使用訓練好的模型進行推理並顯示推理結果。
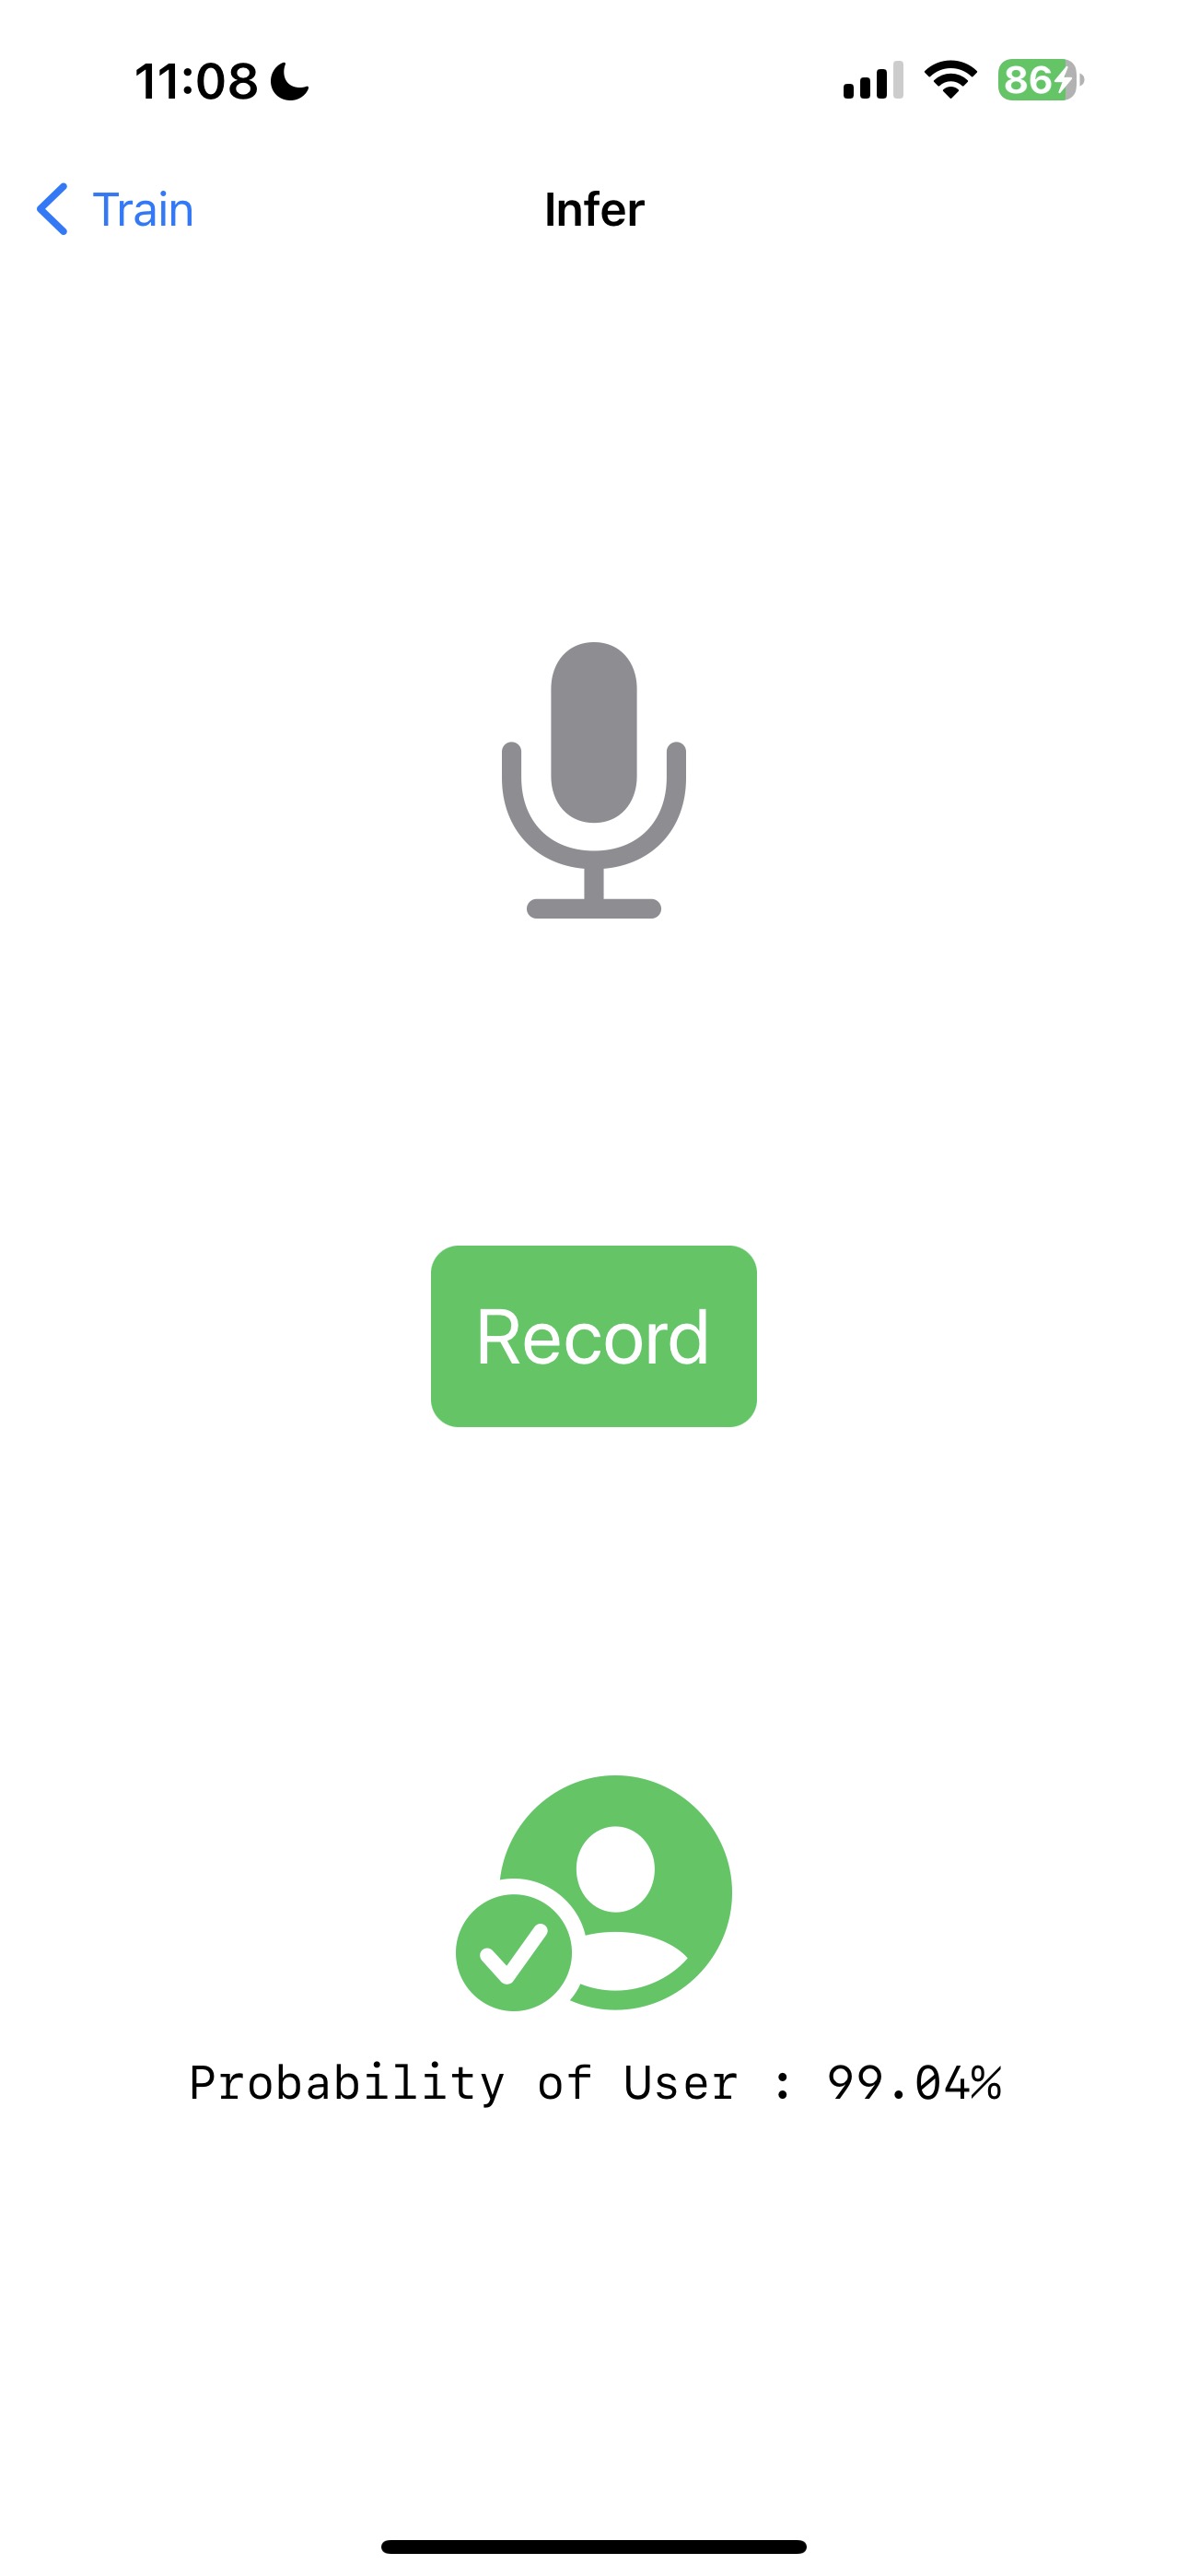
就是這樣!希望它正確識別了您的聲音。
結論
恭喜!您已成功構建了一個 iOS 應用程式,該應用程式可以使用裝置端訓練技術訓練一個簡單的音訊分類模型。您現在可以使用該應用程式訓練您自己的語音模型,並使用訓練好的模型進行推理。該應用程式也可在 GitHub 上找到:onnxruntime-training-examples