使用 ONNX Runtime Web 在 Web 應用程式中分類影像
在本教程中,我們將使用一個 GitHub 倉庫模板來構建一個影像分類 Web 應用,該應用使用 ONNX Runtime Web。我們將使用 JavaScript 在瀏覽器中對計算機視覺模型進行推理。
在不常用於資料科學的語言中進行部署和推理時,最困難的部分之一是弄清楚如何進行資料處理和推理。我們已經透過 此模板 為您完成了所有繁重的工作!
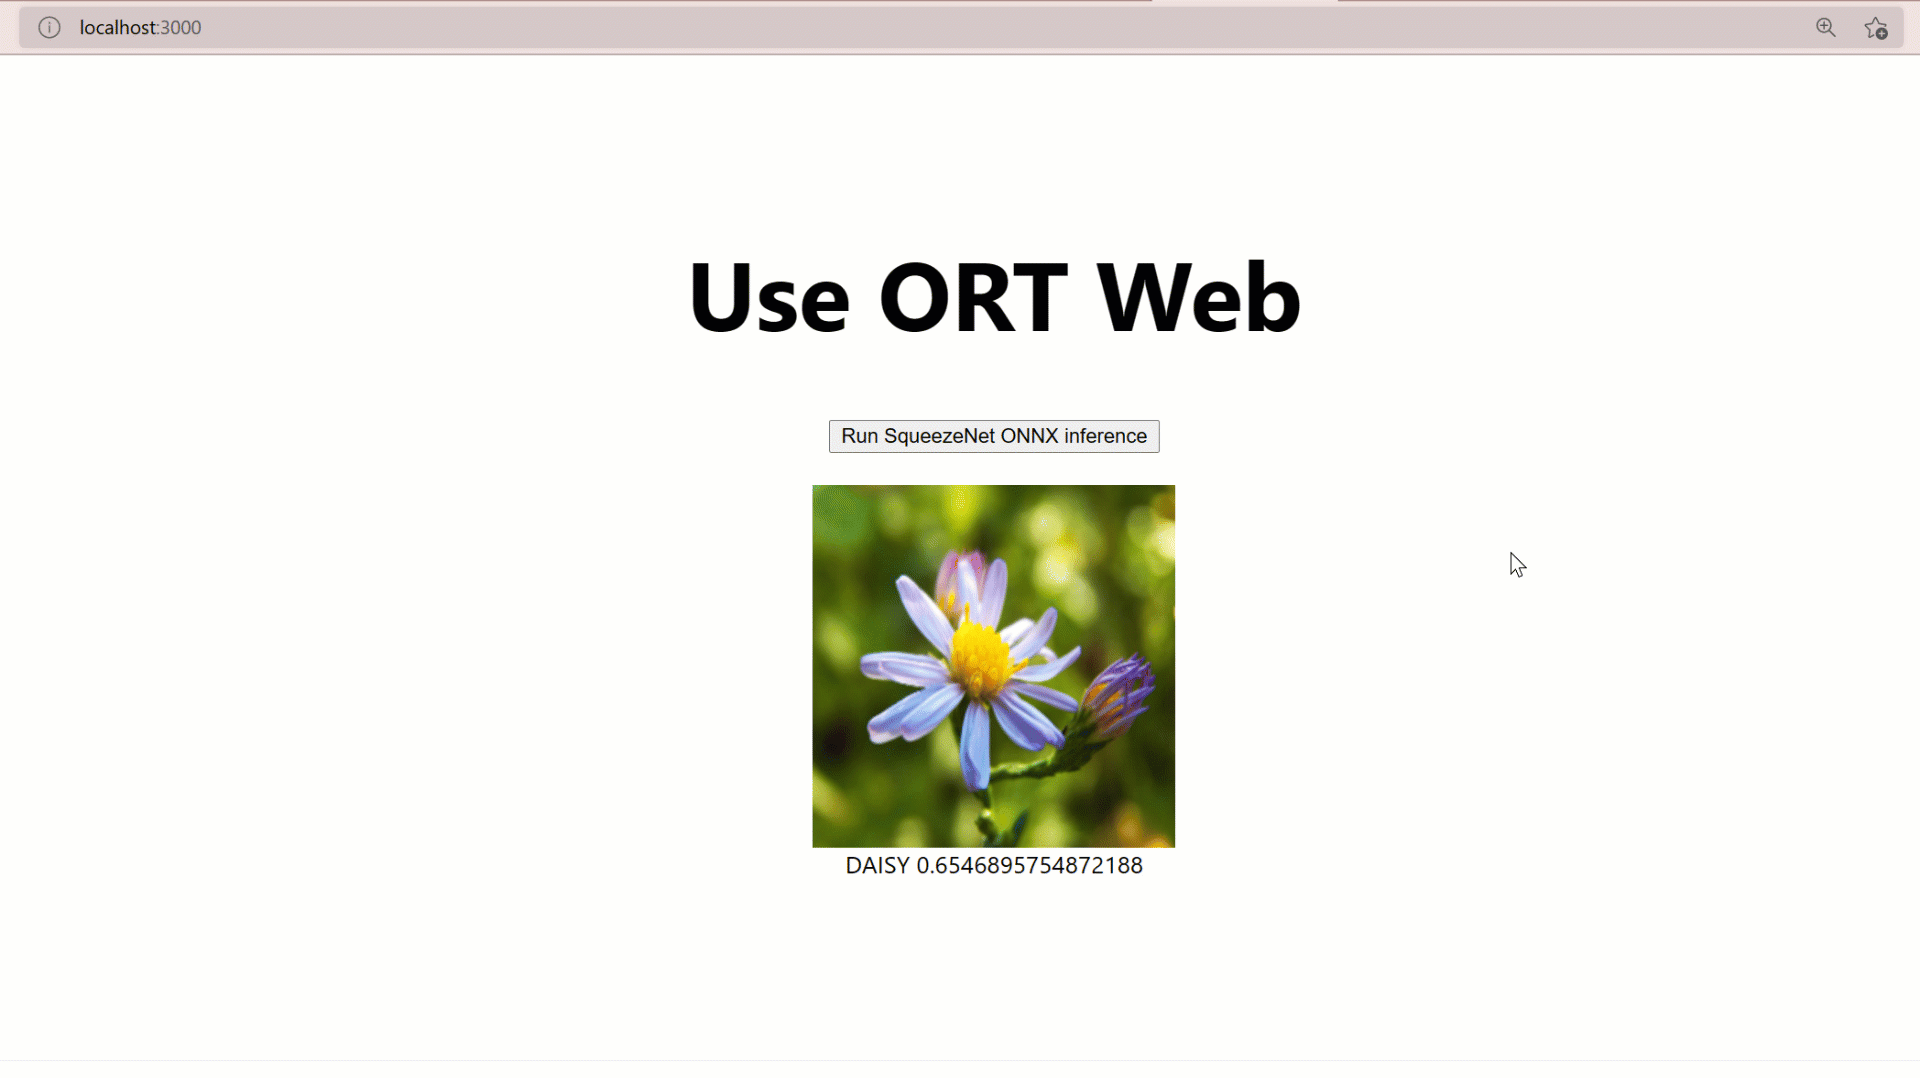
下面是該模板生成的網站外觀。它迴圈遍歷一個示例影像列表,使用 SqueezeNet 模型呼叫推理會話,然後返回推理的得分和標籤。
示例模板輸出
目錄
- 裝置上推理
- SqueezeNet 機器學習模型
- 使用 NextJS (一個 ReactJS 框架) 建立靜態站點,用於在瀏覽器中部署模型
data資料夾- ImageCanvas FSX 元素 Web 元件
- next.config.js
- package.json
- 在本地執行專案
- 部署到 Azure 靜態 Web 應用
- TypeScript 筆記本
- 更多資源
裝置上推理
此應用程式使用 onnxruntime-web JavaScript 庫在裝置(瀏覽器)上執行推理。
SqueezeNet 機器學習模型
我們將使用來自 ONNX 模型動物園 的 SqueezeNet 模型。SqueezeNet 模型執行影像分類——它們將影像作為輸入,並將影像中的主要物件分類到一組預定義的類別中。它們是在 ImageNet 資料集上訓練的,該資料集包含來自 1000 個不同類別的影像。SqueezeNet 模型在大小和速度方面非常高效,同時提供了良好的準確性。這使得它們非常適合對大小有嚴格限制的平臺,例如客戶端推理。
如果您需要更高的模型記憶體和磁碟效率,可以將 ONNX 模型轉換為 ORT 格式,並在應用程式中使用 ORT 模型而不是 ONNX 模型。您還可以 減小 ONNX Runtime 二進位制檔案的大小,使其僅包含對應用程式中特定模型的支援。
使用 NextJS (一個 ReactJS 框架) 建立靜態站點,用於在瀏覽器中部署模型
模板
此模板的目標是為您的加速 ML Web 應用程式提供一個起點。該模板使用 NextJS 框架生成一個計算機視覺應用程式,該應用程式使用 TypeScript 編寫並由 webpack 構建。讓我們深入研究模板並分解程式碼。
utils 資料夾
Utils 資料夾中有三個檔案:imageHelper.ts、modelHelper.ts 和 predict.ts。Predict 是 Web 元件啟動推理的入口點。在這裡,我們匯入幫助函式並呼叫預設函式以獲取影像張量並執行模型推理。
predict.ts
// Language: typescript
// Path: react-next\utils\predict.ts
import { getImageTensorFromPath } from './imageHelper';
import { runSqueezenetModel } from './modelHelper';

export async function inferenceSqueezenet(path: string): Promise<[any,number]> {
  // 1. Convert image to tensor
  const imageTensor = await getImageTensorFromPath(path);
  // 2. Run model
  const [predictions, inferenceTime] = await runSqueezenetModel(imageTensor);
  // 3. Return predictions and the amount of time it took to inference.
  return [predictions, inferenceTime];
}
imageHelper.ts
首先,我們需要從本地檔案或 URL 獲取影像並將其轉換為張量。imageHelper.ts 中的 getImageTensorFromPath 函式使用 JIMP 讀取檔案、調整大小並返回 imageData。JIMP 是一個 JavaScript 影像處理庫。它有許多內建函式用於處理影像資料,例如調整大小、灰度、寫入等。在此示例中,我們只需要調整大小,但在您的程式碼中可能需要額外的影像資料處理。
import * as Jimp from 'jimp';
import { Tensor } from 'onnxruntime-web';

export async function getImageTensorFromPath(path: string, dims: number[] =  [1, 3, 224, 224]): Promise<Tensor> {
  // 1. load the image
  var image = await loadImagefromPath(path, dims[2], dims[3]);
  // 2. convert to tensor
  var imageTensor = imageDataToTensor(image, dims);
  // 3. return the tensor
  return imageTensor;
}

async function loadImagefromPath(path: string, width: number = 224, height: number= 224): Promise<Jimp> {
 // Use Jimp to load the image and resize it.
  var imageData = await Jimp.default.read(path).then((imageBuffer: Jimp) => {
    return imageBuffer.resize(width, height);
  });

  return imageData;
}
一旦我們有了 imageData,我們就會將其傳送到 imageDataToTensor 函式,將其轉換為用於推理的 ORT 張量。要在 JavaScript 中將影像轉換為張量,我們需要將 RGB(紅、綠、藍)值放入陣列中。為此,我們將透過每個畫素的 RGBA 4 個通道迴圈遍歷 imageBufferData。一旦我們獲得了影像的 RGB 畫素通道,我們就可以從 transposedData 建立 Float32Array 併除以 255 以標準化值。為什麼 255 標準化畫素值?歸一化是一種在不扭曲差異的情況下將值更改為通用尺度的技術。255 是 RGB 值的最大值,因此除以 255 將我們的值標準化到 0 到 1 之間,而不會丟失統計差異。現在我們有了影像的 Float32Array 表示,我們可以透過傳入型別、資料和維度來建立 ORT 張量。然後我們返回 inputTensor 進行推理。
function imageDataToTensor(image: Jimp, dims: number[]): Tensor {
  // 1. Get buffer data from image and create R, G, and B arrays.
  var imageBufferData = image.bitmap.data;
  const [redArray, greenArray, blueArray] = new Array(new Array<number>(), new Array<number>(), new Array<number>());

  // 2. Loop through the image buffer and extract the R, G, and B channels
  for (let i = 0; i < imageBufferData.length; i += 4) {
    redArray.push(imageBufferData[i]);
    greenArray.push(imageBufferData[i + 1]);
    blueArray.push(imageBufferData[i + 2]);
    // skip data[i + 3] to filter out the alpha channel
  }

  // 3. Concatenate RGB to transpose [224, 224, 3] -> [3, 224, 224] to a number array
  const transposedData = redArray.concat(greenArray).concat(blueArray);

  // 4. convert to float32
  let i, l = transposedData.length; // length, we need this for the loop
  // create the Float32Array size 3 * 224 * 224 for these dimensions output
  const float32Data = new Float32Array(dims[1] * dims[2] * dims[3]);
  for (i = 0; i < l; i++) {
    float32Data[i] = transposedData[i] / 255.0; // convert to float
  }
  // 5. create the tensor object from onnxruntime-web.
  const inputTensor = new Tensor("float32", float32Data, dims);
  return inputTensor;
}
modelHelper.ts
inputTensor 已準備好進行推理。讓我們呼叫預設的 modelHelper.ts 函式並逐步瞭解其邏輯。首先,我們透過傳入模型路徑和 SessionOptions 來建立 ort.InferenceSession。對於 executionProviders,您可以使用 webgl 來使用 GPU,或使用 wasm 來使用 CPU。要了解有關可用於推理配置的 SessionOptions 的更多資訊,請參閱此處的文件。
import * as ort from 'onnxruntime-web';
import _ from 'lodash';
import { imagenetClasses } from '../data/imagenet';

export async function runSqueezenetModel(preprocessedData: any): Promise<[any, number]> {
  // Create session and set options. See the docs here for more options:
  //https://onnxruntime.llms.tw/docs/api/js/interfaces/InferenceSession.SessionOptions.html#graphOptimizationLevel
  const session = await ort.InferenceSession
                          .create('./_next/static/chunks/pages/squeezenet1_1.onnx',
                          { executionProviders: ['webgl'], graphOptimizationLevel: 'all' });
  console.log('Inference session created');
  // Run inference and get results.
  var [results, inferenceTime] =  await runInference(session, preprocessedData);
  return [results, inferenceTime];
}
然後我們呼叫 runInference 函式,傳入 session 和我們的輸入張量 preprocessedData。
async function runInference(session: ort.InferenceSession, preprocessedData: any): Promise<[any, number]> {
  // Get start time to calculate inference time.
  const start = new Date();
  // create feeds with the input name from model export and the preprocessed data.
  const feeds: Record<string, ort.Tensor> = {};
  feeds[session.inputNames[0]] = preprocessedData;
  // Run the session inference.
  const outputData = await session.run(feeds);
  // Get the end time to calculate inference time.
  const end = new Date();
  // Convert to seconds.
  const inferenceTime = (end.getTime() - start.getTime())/1000;
  // Get output results with the output name from the model export.
  const output = outputData[session.outputNames[0]];
  //Get the softmax of the output data. The softmax transforms values to be between 0 and 1
  var outputSoftmax = softmax(Array.prototype.slice.call(output.data));
  //Get the top 5 results.
  var results = imagenetClassesTopK(outputSoftmax, 5);
  console.log('results: ', results);
  return [results, inferenceTime];
}
推理完成後,我們返回前 5 個結果以及執行推理所需的時間。然後,這些資訊將顯示在 ImageCanvas Web 元件上。
data 資料夾
此模板中的 data 資料夾包含 imagenetClasses,用於根據推理結果索引分配標籤。此外,還提供了 sample-image-urls.ts 用於測試應用程式。
ImageCanvas FSX 元素 Web 元件
ImageCanvas.tsx Web 元件包含按鈕和顯示元素。下面是 Web 元件的邏輯:
import { useRef, useState } from 'react';
import { IMAGE_URLS } from '../data/sample-image-urls';
import { inferenceSqueezenet } from '../utils/predict';
import styles from '../styles/Home.module.css';

interface Props {
  height: number;
  width: number;
}

const ImageCanvas = (props: Props) => {

  const canvasRef = useRef<HTMLCanvasElement>(null);
  var image: HTMLImageElement;
  const [topResultLabel, setLabel] = useState("");
  const [topResultConfidence, setConfidence] = useState("");
  const [inferenceTime, setInferenceTime] = useState("");

  // Load the image from the IMAGE_URLS array
  const getImage = () => {
    var sampleImageUrls: Array<{ text: string; value: string }> = IMAGE_URLS;
    var random = Math.floor(Math.random() * (9 - 0 + 1) + 0);
    return sampleImageUrls[random];
  }

  // Draw image and other  UI elements then run inference
  const displayImageAndRunInference = () => {
    // Get the image
    image = new Image();
    var sampleImage = getImage();
    image.src = sampleImage.value;

    // Clear out previous values.
    setLabel(`Inferencing...`);
    setConfidence("");
    setInferenceTime("");

    // Draw the image on the canvas
    const canvas = canvasRef.current;
    const ctx = canvas!.getContext('2d');
    image.onload = () => {
      ctx!.drawImage(image, 0, 0, props.width, props.height);
    }
    // Run the inference
    submitInference();
  };

  const submitInference = async () => {

    // Get the image data from the canvas and submit inference.
    var [inferenceResult,inferenceTime] = await inferenceSqueezenet(image.src);

    // Get the highest confidence.
    var topResult = inferenceResult[0];

    // Update the label and confidence
    setLabel(topResult.name.toUpperCase());
    setConfidence(topResult.probability);
    setInferenceTime(`Inference speed: ${inferenceTime} seconds`);

  };

  return (
    <>
    <button
      className={styles.grid}
      onClick={displayImageAndRunInference} >
      Run Squeezenet inference
    </button>
    <br/>
    <canvas ref={canvasRef} width={props.width} height={props.height} />
    <span>{topResultLabel} {topResultConfidence}</span>
    <span>{inferenceTime}</span>
    </>
  )
};

export default ImageCanvas;
然後將此 Web 元件元素匯入到 index.tsx 中。
<ImageCanvas width={240} height={240}/>
next.config.js
我們需要在 next.config.js 中新增幾個外掛。這是 NextJS 框架中實現的 webpack 配置。CopyPlugin 用於將 wasm 檔案和模型資料夾檔案複製到用於部署的 out 資料夾。
/** @type {import('next').NextConfig} */
const NodePolyfillPlugin = require("node-polyfill-webpack-plugin");
const CopyPlugin = require("copy-webpack-plugin");

module.exports = {
  reactStrictMode: true,
  //distDir: 'build',
  webpack: (config, {  }) => {

    config.resolve.extensions.push(".ts", ".tsx");
    config.resolve.fallback = { fs: false };

    config.plugins.push(
    new NodePolyfillPlugin(),
    new CopyPlugin({
      patterns: [
        {
          from: './node_modules/onnxruntime-web/dist/ort-wasm-simd-threaded.wasm',
          to: 'static/chunks/pages',
        },             {
          from: './node_modules/onnxruntime-web/dist/ort-wasm-simd-threaded.mjs',
          to: 'static/chunks/pages',
        },
          {
            from: './model',
            to: 'static/chunks/pages',
          },
        ],
      }),
    );

    return config;
  }
}
package.json
由於我們希望將其部署為靜態站點,我們需要將 package.json 中的構建命令更新為 next build && next export,以生成我們的靜態站點輸出。這會生成部署靜態站點所需的所有資產,並將它們放入 out 資料夾中。
{
  "name": "ort-web-template",
  "version": "0.1.0",
  "private": true,
  "scripts": {
    "dev": "next dev",
    "build": "next build && next export",
    "start": "next start",
    "lint": "next lint"
  },
  "dependencies": {
    "fs": "^0.0.1-security",
    "jimp": "^0.16.1",
    "lodash": "^4.17.21",
    "ndarray": "^1.0.19",
    "ndarray-ops": "^1.2.2",
    "next": "^11.1.2",
    "onnxruntime-web": "^1.9.0",
    "react": "17.0.2",
    "react-dom": "17.0.2"
  },
  "devDependencies": {
    "node-polyfill-webpack-plugin": "^1.1.4",
    "copy-webpack-plugin": "^9.0.1",
    "@types/lodash": "^4.14.176",
    "@types/react": "17.0.19",
    "eslint": "7.32.0",
    "eslint-config-next": "11.1.0",
    "typescript": "4.4.2"
  }
}
在本地執行專案
我們準備好執行專案了。根據您是要啟動除錯、構建 out 資料夾,還是不帶除錯啟動,執行相應的命令。
// to run with debugging
npm run dev
// to build the project
npm run build
// to run without debugging
npm run start
部署到 Azure 靜態 Web 應用
現在我們已經構建了站點,可以將其部署到 Azure 靜態 Web 應用。請檢視此處的文件,瞭解如何使用 Azure 進行部署。
TypeScript 筆記本
我們已經介紹瞭如何使用此模板,但這裡還有一個額外的好處!在模板的 notebook 資料夾中,有一個 筆記本 包含這些程式碼,供您試驗和嘗試可能需要的更改。這樣,如果您有不同的模型或影像要嘗試,就可以非常輕鬆地完成。要使用 TypeScript Jupyter 筆記本,請下載 VS Code Jupyter 筆記本擴充套件。
更多資源
-
立即前往 GitHub NextJS ORT-Web Template 倉庫開始使用該模板。
-
請檢視此處的釋出部落格。
-
該模板使用 NextJS,這是一個用於使用 ReactJS 構建應用程式的框架。
-
檢視 ONNX Runtime Web Demo 獲取更多模型。ONNX Runtime Web demo 是一個互動式演示門戶,展示了在 VueJS 中執行 ONNX Runtime Web 的實際用例。它目前支援四個示例,讓您快速體驗 ONNX Runtime Web 的強大功能。
-
這篇部落格展示瞭如何將 ORT Web 與 Python 結合使用,將預訓練的 AlexNet 模型部署到瀏覽器中。
-
檢視更多 ONNX Runtime JS 示例